How to Make a Paper Fortune Teller

Learn how to fold this classic paper fortune teller game and fill it with hidden messages for your friends. This fun origami is also sometimes called a cootie catcher.
If you enjoy this paper-folding project, try making an Origami X-Wing Fighter!
WHAT YOU’LL NEED TO FOLD A PAPER FORTUNE TELLER
- 8 ½-by-11-inch piece of construction paper cut into a square
- Markers
HOW TO CUT A PERFECT SQUARE
If you don’t have a square piece of paper, here’s an easy way to cut an 8 1/2-by-11-inch piece of paper into a square.
WHAT YOU’LL DO TO MAKE A PAPER FORTUNE TELLER
STEP 1: Crease a square piece of paper diagonally from each corner. Fold the top right corner to touch the bottom left corner. Crease the fold with your finger and then unfold it so your sheet is flat again. Then take the top left corner and fold it over to the bottom right corner.

STEP 2: Fold the paper in half from each side. Bring the top edge of the paper to the bottom edge and crease the fold.

Unfold the paper so it’s flat again and rotate it by 90 degrees. Fold the new top edge of the paper to the bottom to crease it and then flatten it out again. Your paper will have four lines intersecting in the middle.

STEP 3: Bring the corners to the center of the paper. Start with one of the bottom corners and fold it to the middle of the paper where the creases intersect.

Press down on the fold with a fingernail so it stays in place.

Turn your paper 90 degrees and fold the other bottom corner toward the center. Keep rotating and folding your paper until you’ve made a smaller square containing four triangles.

Flip the paper over and fold each corner to the center again.

STEP 4: Put numbers in ascending order on the triangles. Start with the No. 1 in the smaller top left triangle on the fortune teller. Write the numbers in ascending order clockwise around the triangles until you get to eight.

Then pick four colors to write on the front side of the fortune teller.

STEP 5: Write the fortunes underneath the flaps. Open up the triangles labeled 1 and 2, and write a short fortune underneath each number. Write small so it fits in the space. Repeat the process under the flap for each number so you have eight different fortunes in all. Close the flaps once you’ve written all the fortunes.
Fortunes you can write:
- “Something amazing is coming your way tomorrow.”
- “You will live a very long and happy life.”
- “Do a Good Turn today!”
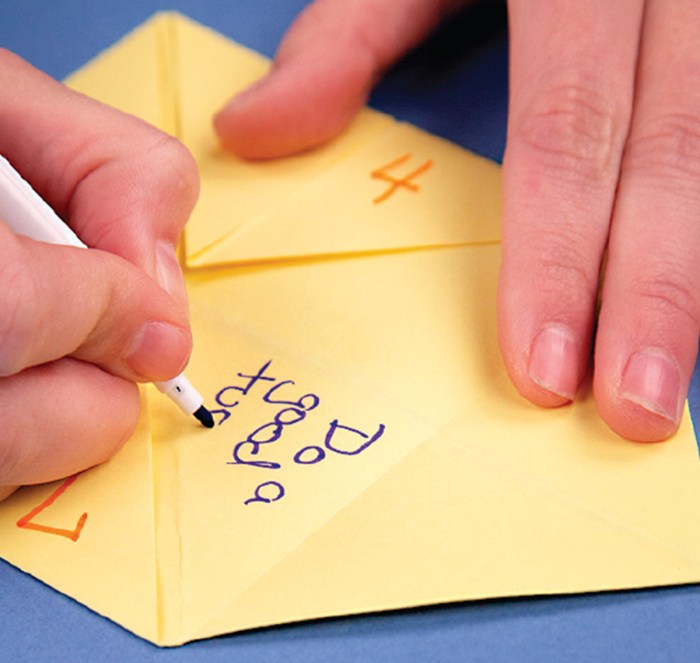
STEP 6: Slide your fingers underneath the squares to operate the paper fortune teller. Ask a friend to choose a color and spell it out.

Then pick a number and count it out. As you do so, move your fingers with each letter and number called out.
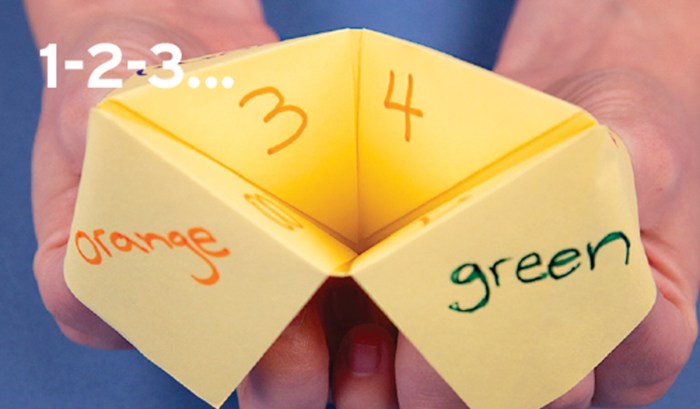
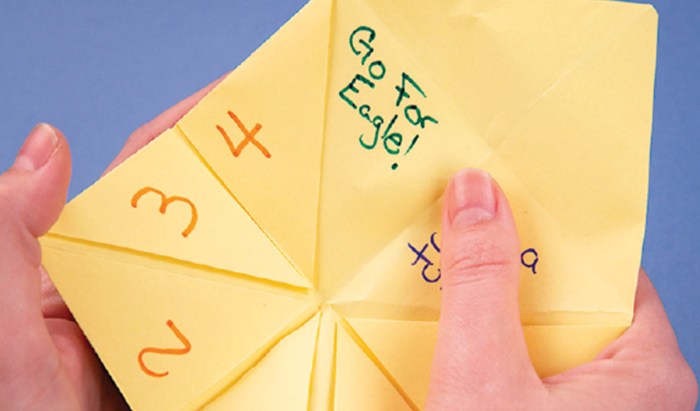
Last, have them pick another number to reveal their fortune. Lift the flap for the number they picked. Read your friend’s fortune out loud.
I don’t why it took me so long I’m crying at these comments. Thanks for the memory refresh it’s been over 16 years since I’ve made one of these
I did it 😀 it was so easy
My mom had to help me on the last one but I did the rest it wus so hard broooooo
Thanks for this! It worked fine for me.
Dat was hard but I love it
I swear I did everything right but it still didn’t work. Massive disapontment😔
HELP ME
Did not work😤
did u use a square bit of paper?
try doing it slowly and carefully
I did everything right and at the end it did not work
Super easy and fun. Thanks for printing the 90s kid back out of me my son will enjoy playing with it
Pe0pLe DId NOtlikE IT.
I did everything right and it did not work!!!!!!!!!!!!
I love it