Build a Chuck Box for Camp Cooking
Make camp cooking easier and more convenient with this portable kitchen box.

WHAT YOU’LL NEED:
- Your cooking gear
- Tape measure
- 9/16″ plywood (You’ll need one standard sheet for the small-size box shown.)
- Four 1″ x 3″ oak planks for the legs (The average height for the swing-down work surface should be 30″ to 34″.)
- Scrap wood for drawer rails
- Eight carriage bolts and wing nuts
- Carpenter’s glue
- Sandpaper
- Drill and bits
- Screwdriver
- Fine-toothed saw
- Chain and six eye screws
- Paint
- Exterior wood screws
- Trunk handles
- Two eye screws and swing hooks
- Piano hinge
- Sturdy plastic wash tubs for drawers
WHAT YOU’LL DO

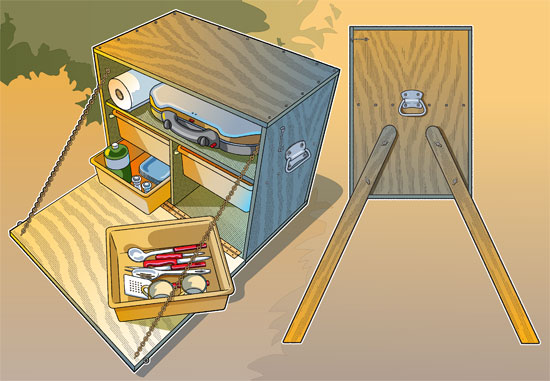
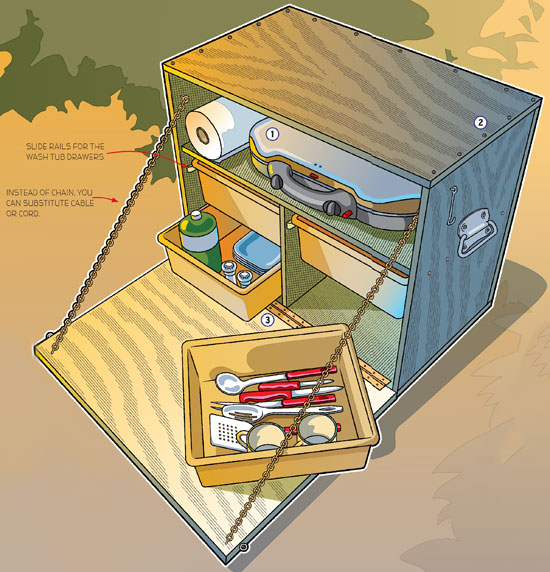
Step 1: Gather all the cooking and cleaning gear you want to store in your chuck box. The amount of gear you have will determine the size of your chuck box and how the inside is designed. The box shown here is just one example of how your box could look. Some boxes have only one or two drawers to make room for larger items such as pots and pans. It’s up to you.
Once you have decided on the size and shape of your box, cut out all the plywood pieces. Sand, prime and paint all plywood surfaces and edges before assembling. This is much easier than painting the box afterward. Add slide rails for drawers if needed.
Step 2: Screw and glue the box together. Remember to predrill all screw holes and countersink the heads for a neat finish. After your box is assembled, lightly sand it and brush on a second coat of paint.
Step 3: Lay the painted door in position and carefully screw on the piano hinge.

Step 4: Attach the chain.
Step 5: Close the door and determine the position of the eye screws and swing hooks before screwing them in place.
Step 5: Attach the trunk handles. (Use nuts and bolts for this so the handles are extra strong. Some larger boxes many need two handles per side.)
Step 6: Fill your chuck box with your cooking gear and you’re ready for your next campout.
YOU CAN ADD SOME LEGS
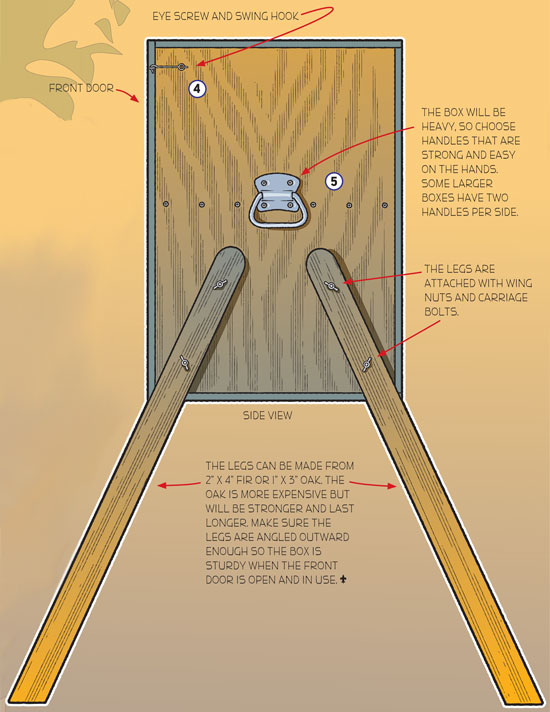
Adding legs can get your chuck box off the ground and easily accessible. If you don’t have a tailgate or picnic table to set your chuck box on, this is definitely the way to go. The legs store flat and can be attached with no tools needed using wing nuts and carriage bolts.
The legs can be made from 2″ x 4″ fir or 1″ x 3″ oak. The oak is more expensive but will be stronger and last longer. Make sure the legs are angled outward enough so the box is sturdy when the front is open and in use.
PHOTOS OF COMPLETED PROJECT
Check out these photos of chuck boxes sent to us by Boys’ Life readers. If you have a photos of a BL Workshop project, please use the form below to send them to us.


So, does the menu determine the cookware or does the cookware determine the menu? and thus determining the size and weight of the chuck box. If too big/heavy not even the adults will want to use it. Just like packing for a hike, one must decide what is necessary.
that is cool and looks like that might be a little heavy I like the idea but how could I make it lighter?