How to Build and Race a Fast Raingutter Regatta Boat
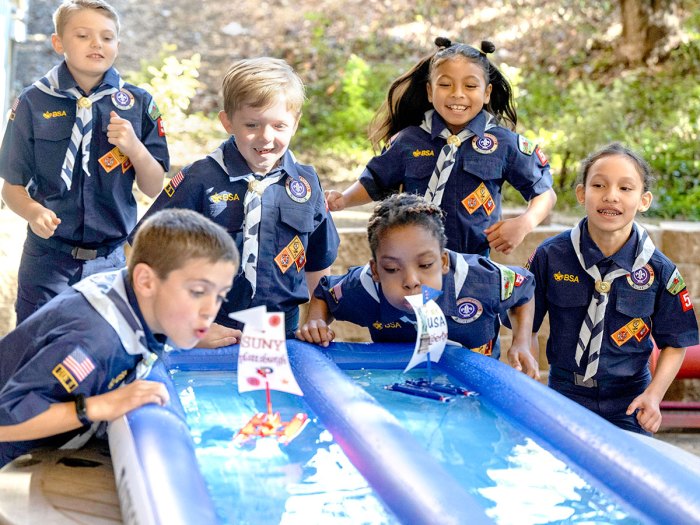
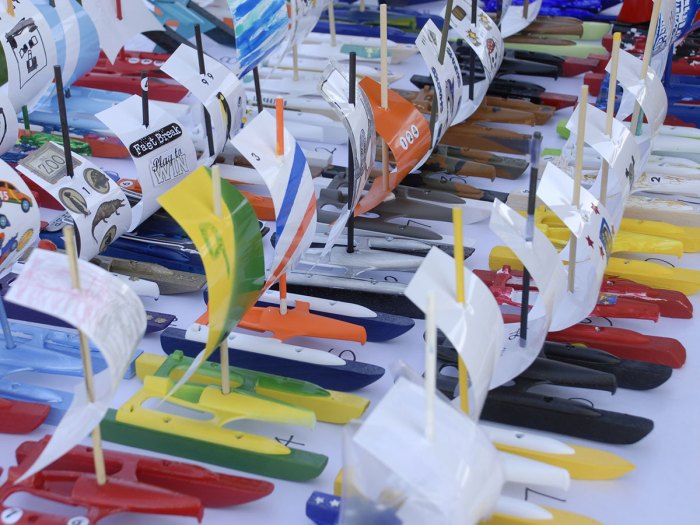
The Raingutter Regatta is a fun and exciting Cub Scout race where small, handmade boats are floated down a water-filled track, often made from rain gutters. Racers blow air at their boats to make them move. The challenge is to build a boat that moves quickly through the water while staying straight.
Have you made a Raingutter Regatta boat? Send us a photo!
What Are the Raingutter Regatta Rules?
Most races follow these common rules:
- Boats must be between 6 ½ and 7 inches long.
- Boat must be 3 ¼ inches wide (the width of the plastic hull).
- Mast must be between 6 and 7 inches from deck to top.
- Boats are only powered by a racer blowing air — no touching allowed!
- The first boat to reach the end of the track wins.
Cub Scout packs often have have their own rules for their race, so be sure to check for any additional requirements before you build your boat.
What You’ll Need to Build Your Boat
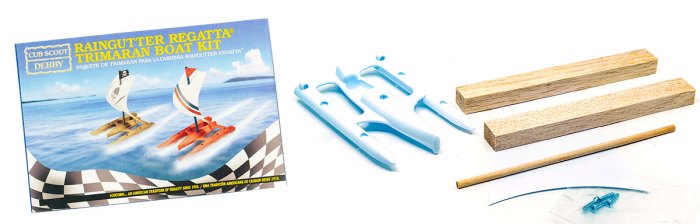
The Raingutter Regatta Trimaran Boat Kit ($6.99, scoutshop.org) contains everything you need to build a boat. Many packs require racers to use this kit, which includes:
- Trimaran hull
- 2 Outriggers
- Mast
- Sail
- 4 Wood screws
- Sanding stick
- Number stickers
You may also need the following items that are not included in the kit:
- Phillips head screwdriver
- Glue or rubber cement
- Spray paint or other non-water-based paint
- Paintbrush
- Waterproof sealer
- Fine-grain sandpaper
- Fun stickers or permanent markers to decorate sail
Note: Some packs use other materials to build their boats. Popular options include foam pool noodles cut in half, water or soda bottles, juice boxes or even vegetables!
Tips For Building a Fast Raingutter Regatta Boat
Using the materials in the official trimaran kit, here’s how to build a boat that can race like a champion!
1. SHAPE THE OUTRIGGERS: The two balsa wood pieces are called outriggers. They will be attached underneath the plastic hull using four screws. These outriggers help keep your boat stable and floating properly in the water.
Before doing anything else, check that both outriggers are the same length and width. If they are uneven, your boat may veer off course instead of moving straight. If needed, use a sanding stick or sandpaper to carefully trim them to equal size.
For better performance, shape the outriggers by sanding the front ends into a smooth, tapered point while keeping the bottoms as flat as possible. Avoid creating a V-shape or rounding the bottoms because flat-bottomed outriggers allow the boat to skim the top of the water rather than sinking into it.

Handle the balsa wood with care while shaping it because it is fragile and can break easily.
2. TEST-FIT THE OUTRIGGERS: Before painting and sealing the outriggers, temporarily attach them to the plastic hull to check their balance and alignment.
Position each outrigger so that it extends about ½ inch behind the hull, with the majority of its length positioned toward the front of the boat. This setup helps lift the bow, preventing it from dipping into the water.
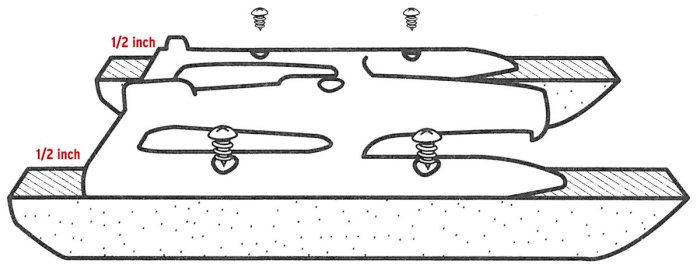
You’ll also want to make sure that the two outriggers are parallel to each other.
Once the outriggers are secured with screws, place the boat on a flat surface and gently rock it side to side. If it wobbles unevenly, lightly sand the bottoms of the outriggers until the boat sits level and stable.
When everything looks stable, carefully remove the screws — it’s time to paint and seal the outriggers!
3. PAINT AND SEAL THE OUTRIGGERS: Since balsa wood absorbs water, it should be sealed to prevent it from becoming waterlogged.
Start by painting the outriggers with spray paint or another non-water-based paint in any color you like. Once the first coat is dry, lightly sand the surface to smooth out any rough spots, then apply a second coat for even coverage.
To fully protect the wood, finish with a waterproof sealer such as polyurethane. This will help keep the outriggers waterproof and durable.
Be careful not to apply too much paint or sealer — adding too much weight could slow down your boat!
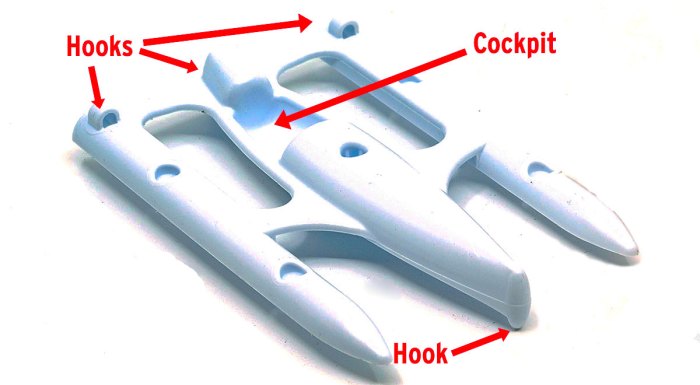
4. PREPARE AND ATTACH THE HULL: If your pack’s rules allow modifications to the hull, you can trim excess plastic to reduce weight. Removing parts like the bottom of the cockpit and the plastic hooks on the bow and stern will make the boat lighter and minimize water resistance, helping it move faster.
To add a personal touch, decorate the hull with spray paint or permanent markers. Choose colors and designs that make your boat stand out while keeping it lightweight.
Once the hull is ready, reattach it to the balsa wood outriggers using the same screw holes from Step 2. Ensure the screws are tightened securely. If they feel loose, apply a small amount of glue in the screw holes before fastening them.
Finally, double-check that the boat sits level and that the outriggers are straight and parallel. A balanced boat will stay on course and glide smoothly through the water.
5. ATTACH THE MAST: Insert the mast into the hole in the center of the plastic hull. If the mast is too thick to fit, carefully sand the end until it slides in smoothly. Avoid forcing it, as too much pressure could crack the plastic.
Once the mast fits properly, apply a small amount of glue or rubber cement to the hole. This will help keep the mast secure, preventing it from rotating or falling out during the race.
6. DECORATE AND ATTACH THE SAIL: Before attaching the sail, decorate it with permanent markers or stickers to give your boat a unique look. Then, slide the mast through the holes in the sail to secure it in place.
If your pack’s rules allow, position the bottom of the sail so it touches the deck of the hull. If this isn’t permitted, place it as close to the deck as possible. A sail positioned too high will push the bow into the water, creating drag and slowing your boat down.
To prevent the sail from catching the edge of the raingutter during the race, consider trimming the outer edges so it doesn’t overhang the boat — just be sure your pack’s rules allow modifications.
For the best performance, adjust the top of the sail so it’s positioned about halfway down the mast. This will create a good shape for catching the wind while minimizing drag. Some experts suggest folding the sail into a cone for better airflow, but check if this is allowed in your competition.
Once you’re happy with the sail’s position, double-check that it is straight, then apply glue to the holes to keep it securely in place.
Using Your Breath to Propel Your Boat
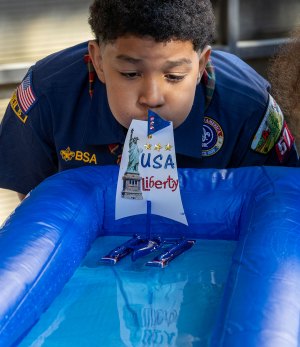 The way you blow into your boat’s sail is the most important factor in winning the Raingutter Regatta.
Some races use small fans or bellows to provide wind, but usually you’ll be using your own breath to power your boat either through a straw or just with your mouth.
POSITION YOURSELF CORRECTLY:
- Lean way over the raingutter so you’re directly behind your boat.
- Avoid blowing down at the boat or from the side — this can slow it down or make it turn.
- Don’t get too close. Stay about 6 inches to 1 foot behind your boat for the best control.
BLOWING TECHNIQUES FOR SPEED:
- Short, fast breaths usually work better than long, powerful ones.
- Aim directly at the center of the sail or slightly up to keep your boat moving straight.
- If your boat starts to veer left? Blow slightly to the left side of the sail.
- Veering right? Blow slightly to the right side of the sail.
You may want to practice in a pool or bathtub to perfect your technique!
KEEP GOING UNTIL YOU FINISH! Don’t stop blowing until your boat reaches the finish line! A steady, controlled technique will help you sail smoothly and quickly to victory.
Have you made a Raingutter Regatta boat? Send us a photo!
Thanks
My son just won first place today with this design. Honestly, no one else was even close
We give the boys a bendy straw to use for blowing on the sail. They have to keep track of their straw so they have something to drink their root beer floats at the end of the races. Also, make sure and create a surface around the edges to break surface tension that forms when the boat hits the side of the gutter. My kids wrapped their boats in duct tape the last few years, pretty fast
how do you make a good sail design
usually, you would want your sail slightly curved and wide to catch as mush air from the fan as possible. The curved sail design will help contain the air flow within the sail to help stability, as well.