Make a Homemade Candy Dispenser
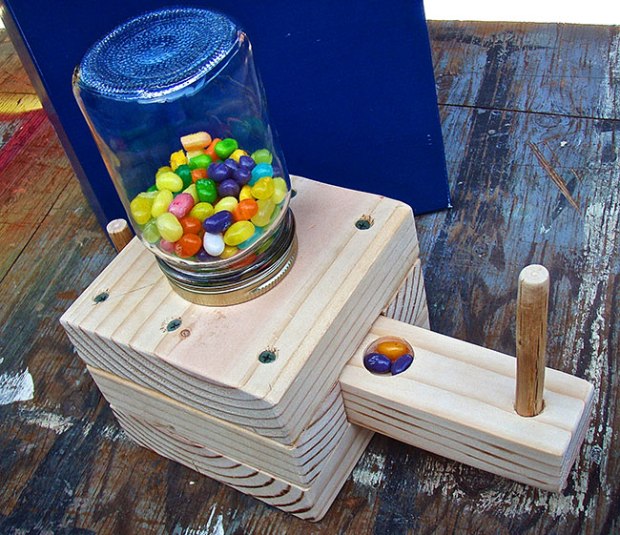
You can make this dispenser for jelly beans, gumballs or any other hard candy that will fit in it.
WHAT YOU’LL NEED
- 2″ x 6″ board, 24″ long (The actual size of a 2″ x 6″ board is 1 1/2″ x 5 1/2″.)
Cut the board as follows:
- 2 1 1/2″ x 5 1/2″ x 5 1/2″ boards (top and base)
- 2 1 1/2″ x 1 3/4″ x 5 1/2″ boards (sides)
- 1″ x 1 7/8″ x 11″ board (slide)
- Tape measure
- Pencil
- Pocketknife
- Sandpaper
- Wood glue
- 1 dowel or peg about 1/4″ in diameter, 4″ long
- 1 dowel or peg about 1/4″ in diameter, 2″ long
- A clean quart or pint canning jar with its metal ring
- Crosscut saw for sawing across the grain
- Ripsaw for sawing with the grain
- Drill
- Drill bit, sized for pre-drilling 2 1/2″ holes
- 7/8″ spade bit
- Countersink bit (so driven screws are flush)
- Screwdriver
- 12 wood screws, 2 1/2″ long
- 4 flat-head brads for nailing jar ring to top of dispenser
- Small drill bit for pre-drilling brad holes in jar ring
- Jelly beans or gumballs
WHAT YOU’LL DO
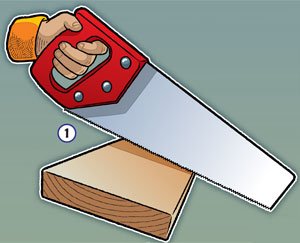 1. Cut all the boards to size and sand smooth.
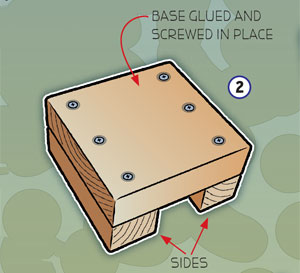 2. Glue and screw the base onto the sides.
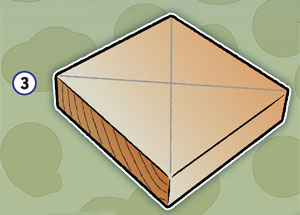 3. Pencil an X from corner to corner on the top board.
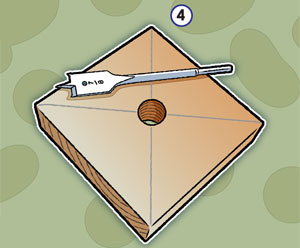 4. Drill a 7/8″ hole through the center of the top board.
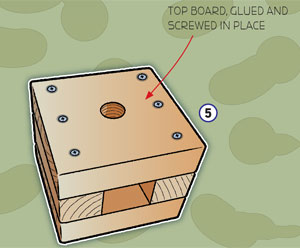 5. Glue and screw the top board onto the sides and base. Sand the slide until it moves smoothly in the square hole in the center of the dispenser.
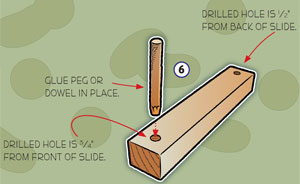 6. Drill a hole 3/4″ from the front of the slide. This is for the 4″ peg or dowel. Drill a hole 1/2″ from the back of the slide. This is for the 2″ peg or dowel. Glue the 4″ peg or dowel in the front hole on the slide.
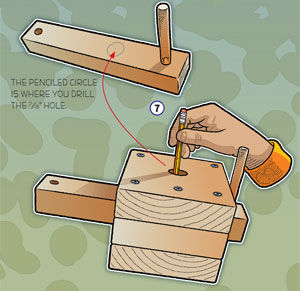 7. Push the slide into place until it stops at the 4″ peg. Draw a circle through the 7/8″ hole on the top board onto the slide.
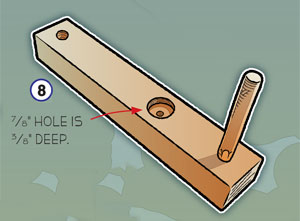 8. Drill a 7/8″ hole 3/8″ deep into the slide as shown.
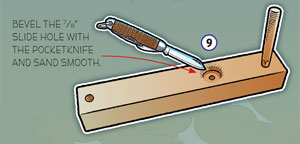 9. Bevel the 7/8″ slide hole with the pocketknife and sand smooth.
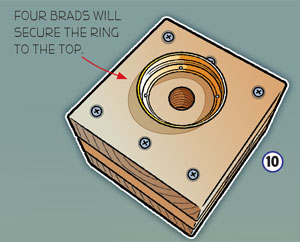 10. Drill and nail the jar ring onto the top board.
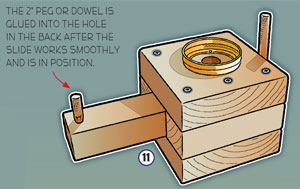 11. Push the slide into place. When the slide is pushed in all the way, the hole in the top and the hole in the slide should line up. Glue the 2″ peg or dowel onto the back of the slide.
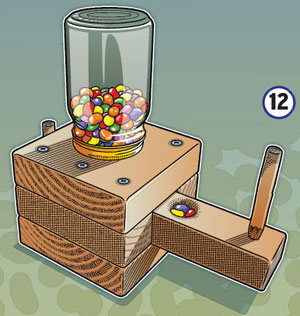 12. Fill the jar with candy, screw it onto the ring and your dispenser is complete.
PHOTOS OF COMPLETED PROJECT
Check out these photos of the completed project sent to us by Boys’ Life readers. If you have a photos of a BL Workshop project, please use the form below to send them to us.


This is so simple. I am 12 yrs old and i done all of it by myself, expect for the sawing and cutting
You can cut it yourself, not that big of a deal
I wonder if this gets stuck but it looks cool
SWEET!!!!=)
I’ll have to make it and see if M&M’s candy work in it too!
I hate it!
Why it is awesome
I like this candy dispenser:)
This is a really awesome idea!!!!!!!!!!!!!!!!!!!
This is so awesome, i want to do it so bad for my room! #HalloweenCandy!
neat
that looks cool to make I wonder if it gets jammed
Awesome totally gonna ask my grandpa if we can make one!