How to Whip and Fuse the Ends of Rope
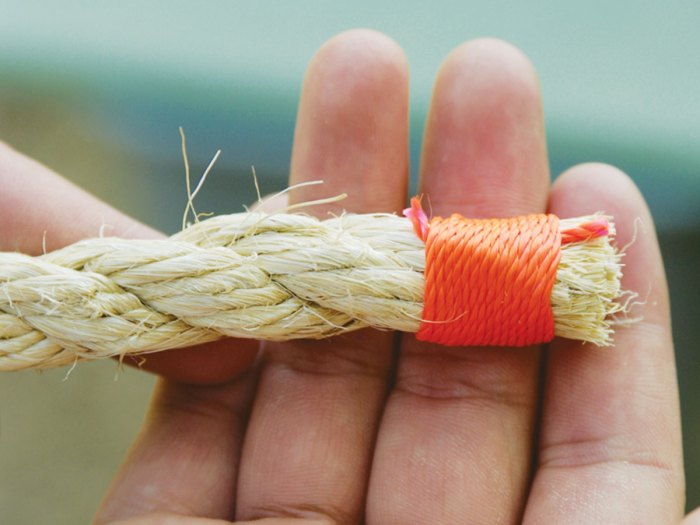
The more you use rope, the more it frays. If you whip and fuse rope, you can make one of the most important tools in Scouting last a little longer.
WHAT YOU’LL NEED
- Frayed rope
- At least 10 inches of string, dental floss or thin twine
- Scissors
- A lighter, match or candle
HOW TO WHIP THE END OF A ROPE
For natural-fiber rope like sisal or cotton, you’ll whip the rope.
1. Cut off the part of the rope that is unraveling.
2. Cut a piece of strong string, dental floss or thin twine at least 8-10 inches long. Make a loop and place it on one end of the rope.
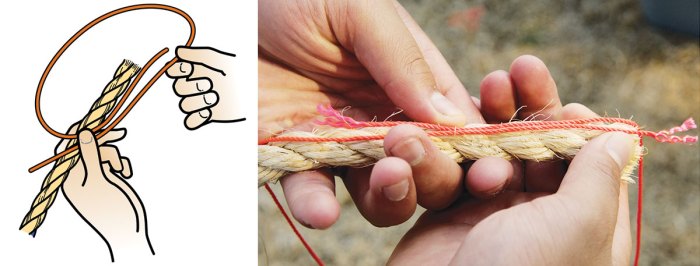
3. Wrap the string tightly around the rope several times.
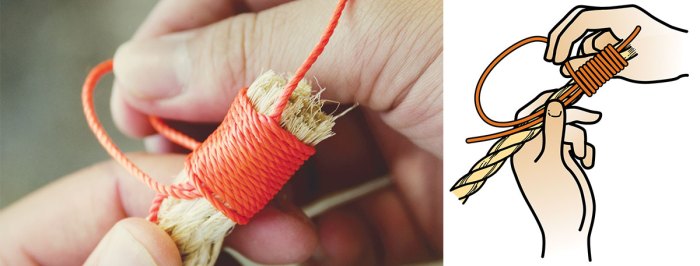
4. When the whipping is as wide as the rope is thick, slip the end through the loop.
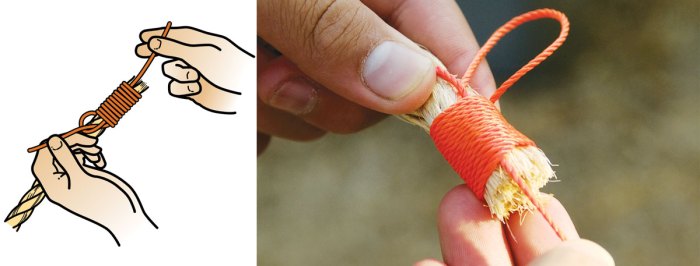
5. Pull the string ends tightly and cut them off.
HOW TO FUSE THE END OF A ROPE
For synthetic materials like nylon, fuse the rope. Rope and cord made from plastic or nylon will melt when exposed to high heat.
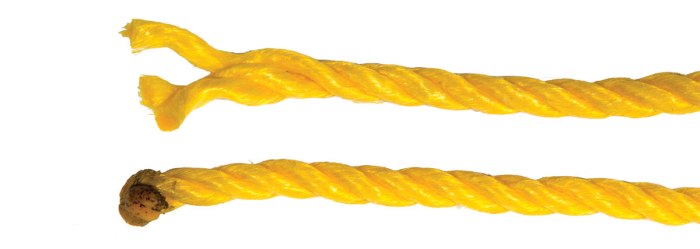
1. Cut away the frayed part of the rope.
2. Working in a well-ventilated area, hold each end of the rope a few inches above a lighter, match or candle to melt and fuse the strands together.
3. Let it cool off for a few minutes.
Be careful: Melted nylon is hot and sticky, so don’t touch the end until it’s completely cool.
nice
This was so helpful, and I keep coming back to it.
Using it again.So helpful
OH YEA I LOVE THIS ARTICLE! SO HELPFUL
Is there only one acceptable way to whip a rope? Or are both ways considered correct?
Chord ends, (such as para chord), ends can be melted together in a similar way to melting the end of a rope. The sheaf (protective covering on the chord), often melts quicker then the chord core. The sheaf can be slid back from the core. Melt the core first, then when the core melts down some, slide the sheaf back toward the end of the chord and carefuly melt and compress together.
Pictures or illustrations of the method from James L would be very helpful.
EPIC ARTICLE, BRO!
nais! this article has helped me tons
Yes this is ONE method. IMHO, it is not as simple as it could be. The following method eliminates the need to try and hold and wrap the “other” end at the same time, as in the above. Hold the Big Rope with your left hand so the end is to your right. With the twine, form a tight bight adjacent to the big rope such that the bight is up next to the end of the big rope, and twine end “A” and the running piece of the twine is under your left thumb. With right hand, take the running end “B” and wind the twine tightly from your left thumb, toward the BR end. The bight is under the windings, yes? When the twine windings (Tight!) is about as wide as the diameter of the BR, push end “A” thru the bight, which is sticking out of the windings.. Carefully pull the end which is under your left thumb so the running end is pulled under the twine windings. Pull it thru until the bight and it’s pulled end “B” is half way under. Pull both ends (A & B) so all is snug. Trim ends off close to the windings. The “whipping” should then be so snug and tight it will hold the BR end tight and will itself not come loose. If you are insecure, rub the whole end with tar, GOOP, coat with SuperGlue or other adherent.