How to Make a Fun Magnetic Wand
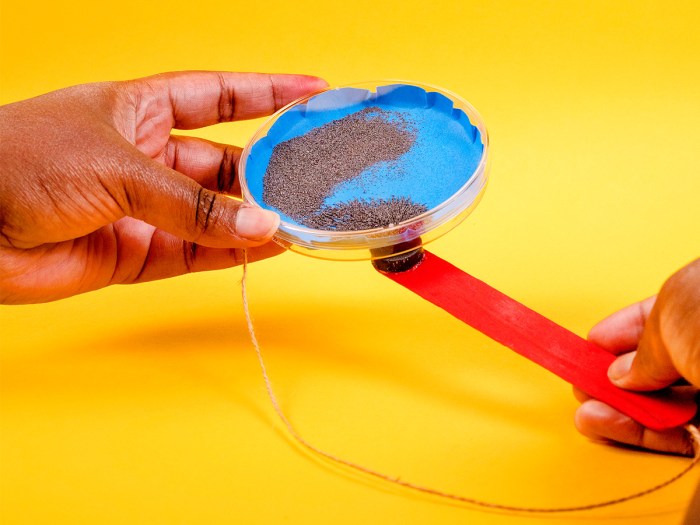
This fun magnetic device can help you increase coordination skills. Strengthen the small muscles in your hands and wrists as you create shapes and letters.
WHAT YOU’LL NEED TO MAKE A MAGNETIC WAND
- 1 petri dish (available at big box stores)
- 1 craft stick
- 1 sheet of construction paper (any color except black)
- 7-8 inches of twine
- 1 magnet
- Scissors
- Iron filings (available at craft stores)
- Craft glue
- Markers, crayons or colored pencils (optional)
WHAT YOU’LL DO TO MAKE YOUR MAGNETIC WAND
PART 1: PETRI DISH LINING
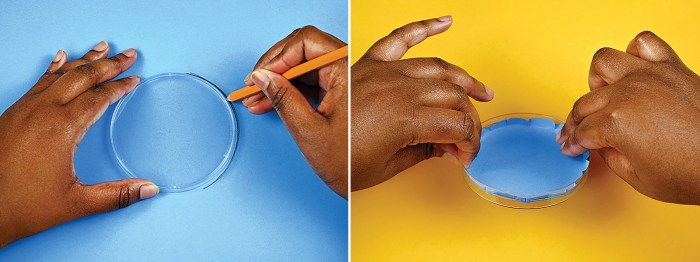
Step 1. Trace the top half of your petri dish on a sheet of construction paper.
Step 2. Cut out your circle. Then use the craft glue to glue your circle inside the bottom of the petri dish. The edges of the circle will fold up along the sides of the dish — this will keep the iron filings from slipping underneath the paper.
Optional: Using a marker, crayon or colored pencil, draw a picture or shape on your circle to fill in at the end.
PART 2: MAGNETIC WAND
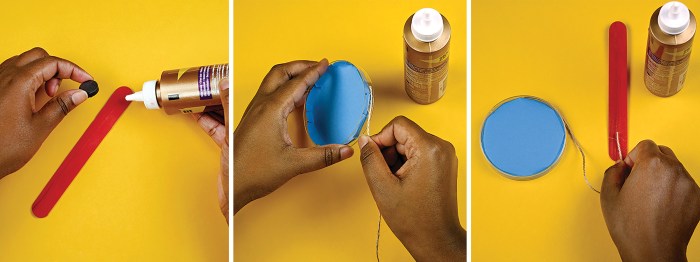
Step 1. With the craft stick lying flat, glue your magnet to one end.
Step 2. Now glue one end of your twine to the outside edge of the bottom of the petri dish, leaving enough room for the top lid to fit.
Step 3. Glue the other end of your twine to the non-magnet end of the craft stick.
PART 3: ADDING IRON
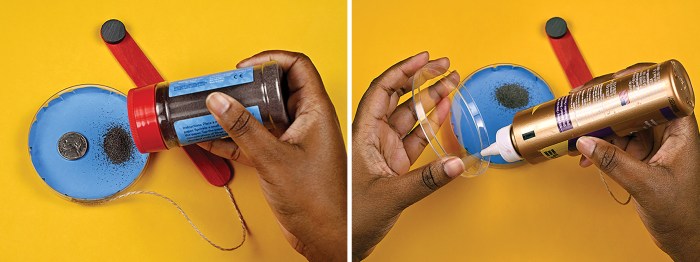
Step 1. Carefully sprinkle a small amount of iron filings (about the size of a nickel) in the bottom of your dish. Have an adult help with this step if needed.
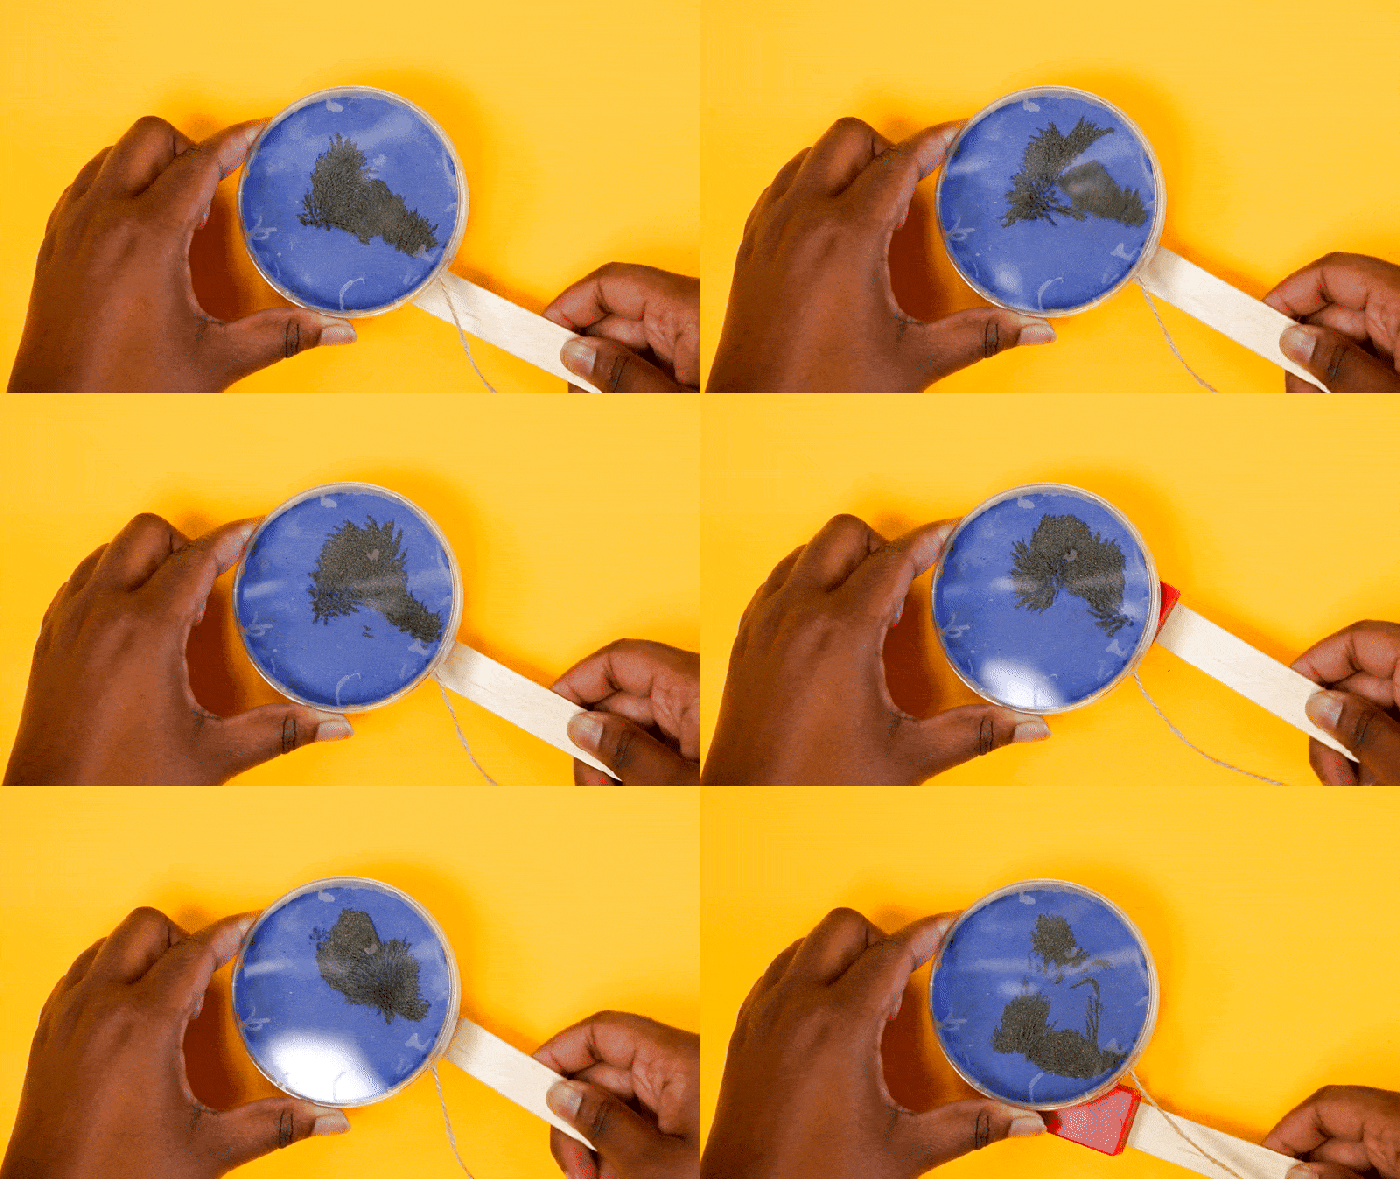
Step 2. Close the petri dish and carefully test your wand underneath the dish. The iron should follow the wand. Adjust the iron filings as needed.
Step 3. Once ready, glue down the top of your petri dish by adding glue to the inside of the top half of the dish. Let your dish dry completely before using.
Step 4. Test your wand by waving it underneath and on top of your dish to form a shape or letter with the iron. If you drew something on your circle, try to fill it in using the wand.
Leave a Comment