Learn How to Draw a Bear From a Pro
Bears are fun to draw. Watch this video to find out how to draw one with this art lesson from Aaron Blaise, an Oscar-nominated animator who worked on The Lion King, Aladdin, Brother Bear and more.
HOW TO DRAW A BASIC BEAR IN 5 STEPS
Here’s a step-by-step guide for drawing a basic bear.
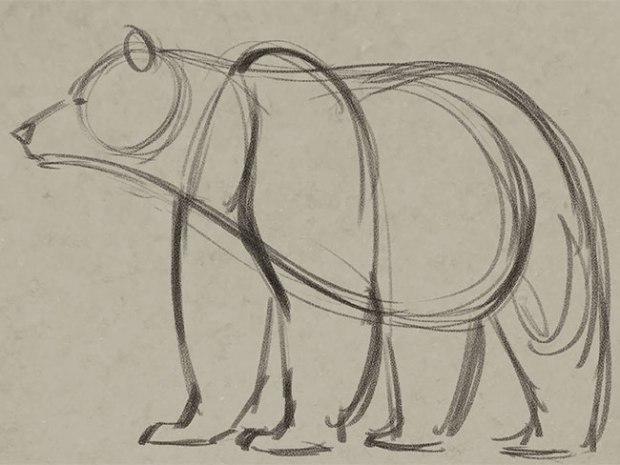
1. Start by lightly sketching the rough form of a grizzly bear on toned paper. Notice how the head and neck flows right into the body. The shoulders and legs can be added next.
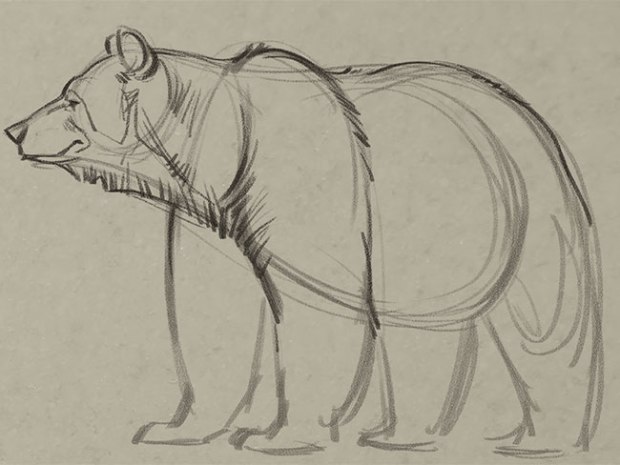
2. Using your rough sketch as a guide, start to add the details such as facial features and fur textures.
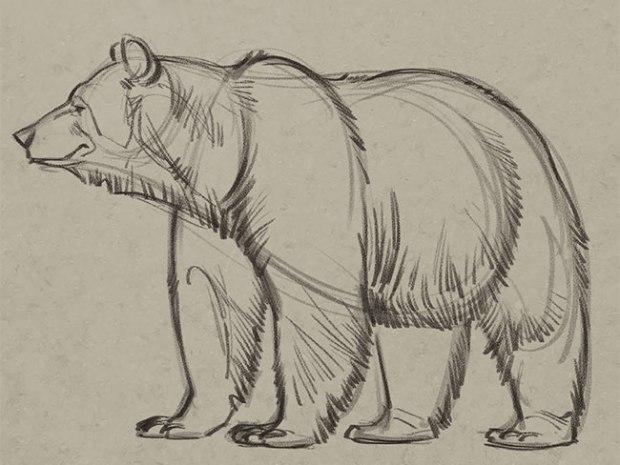
3. Finish out the detail. Be sure to make your bear nice and shaggy.
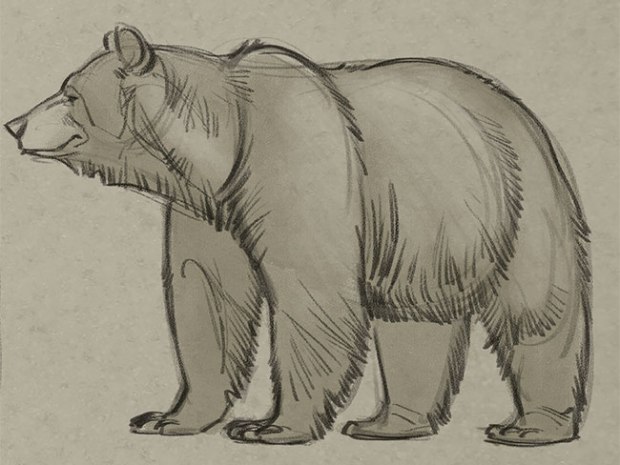
4. Now you’re ready to add some color. Start with the base color of the bear.
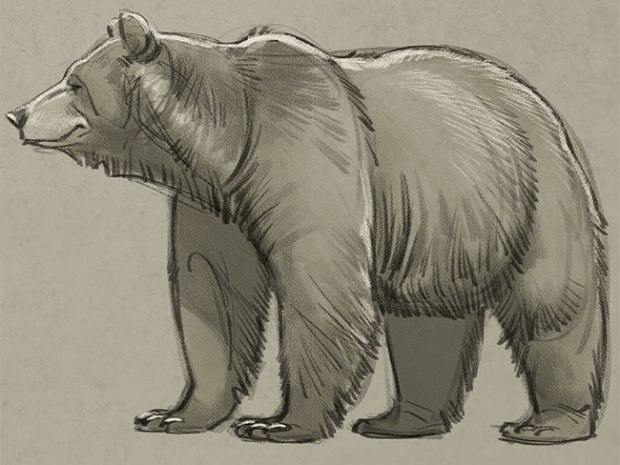
5. Finish it all off by adding some deeper shadows and highlights. This stage really enhances the fur texture and gets your bear to “pop” right off the page!
HOW TO DRAW A BEAR HEAD
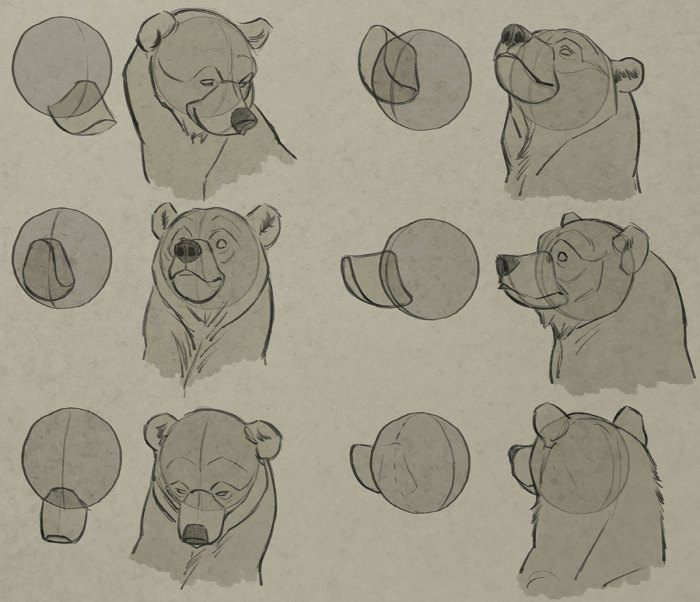
When drawing the head of a bear, start with drawing a sphere. Then attach a simplified snout to it.

Keeping the approach simple like this will enable you to draw a bear’s head from any angle.
HOW TO DRAW FUR ON YOUR BEAR DRAWING
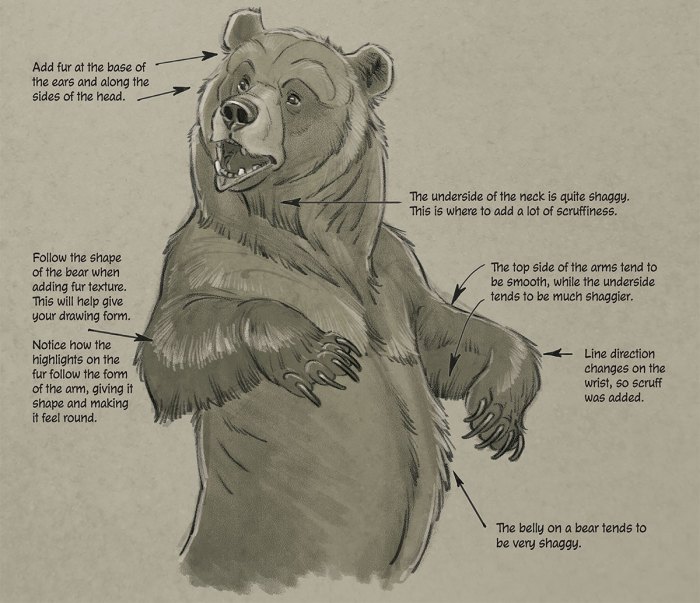
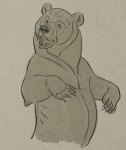 Creating the illusion of fur is really about knowing where to add some scruffiness rather than drawing thousands of individual hairs all over your drawing.
The drawing on the right consists of only smooth lines. By adding a few scruffy spots in select areas, you can make your bear look furry. Look for areas where the line direction changes. At these areas, add some scruff. Also, on a grizzly, the underside of the bear tends to be scruffier than the top.
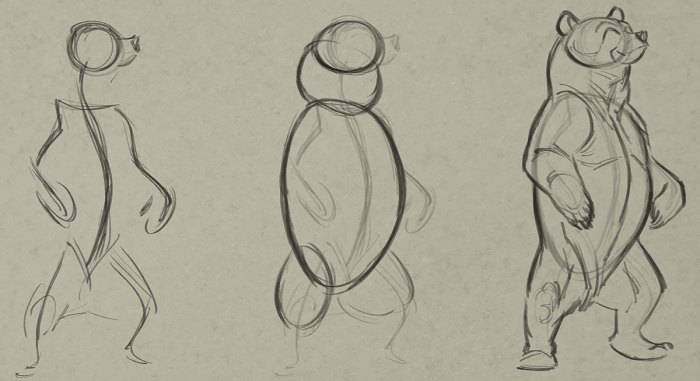
HOW TO DRAW A STANDING BEAR
1. Start simply. Draw a circle for the head and a “wire frame” for the body. Be sure to find the “flow” of the pose.
2. Now start to rough in the body by drawing the major masses: head, trunk and hind legs.
3. Using your rough drawing as a guide, start to loosely sketch the rest of the anatomy.
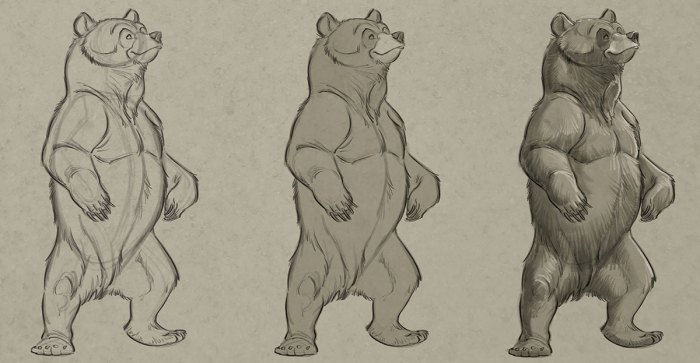
4. Lightly erase your drawing at this point. Then start to draw in the details and fur texture. Notice the fur is broken up into clumps.
5. Now add some color. Start with the base color of your bear. Be sure to leave the snout light.
6. The final step is adding shadows, highlights and fur texture. Toned paper lets you add highlights with a light-colored pencil, pen or pastel. You can also erase to create light areas. Shadows can be added with dark pencil or charcoal.
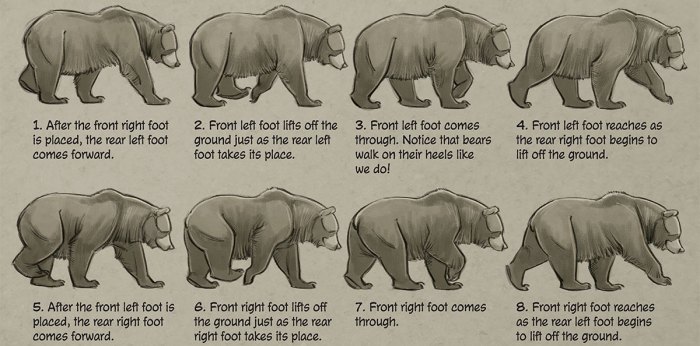
HOW TO DRAW A WALKING BEAR
Now that you can draw a bear, here’s how to put it into motion.
HOW TO DRAW A RUNNING BEAR CUB
In four-legged locomotion, the faster an animal moves, the fewer feet it will have on the ground at any given time. Notice in the walk above that three feet are almost always on the ground, while in the run shown here, there are never more than two feet on the ground at any given time.


it helped me out a lot
Thank u so much I loved how much it helped me draw! I just came from Lake Tahoe and saw A mommy bear and two bear cubs. Here is a joke about bears:What do u call a bear with no teeth? A GUMMY BEAR!!!
drawing this for an every child matter shirt. it helped alot. thanks🙏 -a child
thank you
Tricky
This was awesome! Thank you so much! I loved the video!
cool
You are really helpful. I like how you go slow use the step by step teaching.
Thanks
Helped me draw a bear! Awesome 😎
The pictures were great, really did help me!!
Thanks for the video it was really helpful! And I recommend it to anyone who wants to know how to draw a bear!