How to Use Lashings to Build a Comfortable Camp Chair
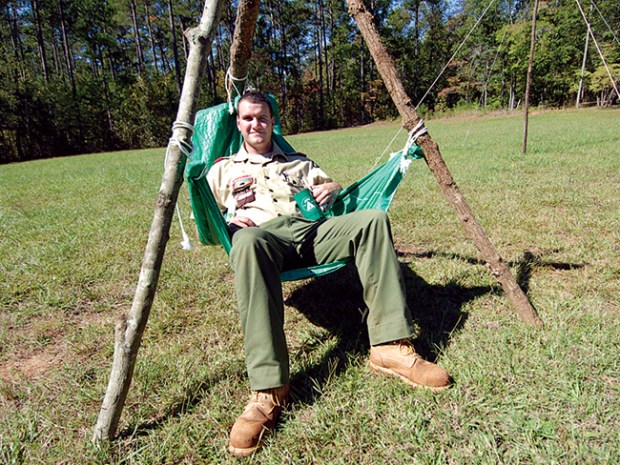
Relax around camp by building a comfortable camping chair. It’s easy if you have the pioneering skills.
WHAT YOU NEED TO MAKE A CAMP CHAIR
- Three spars about 4 inches in diameter, two 8 feet long and one 12 to 15 feet long
- Four sections of rope, one 30 feet long and three 3 to 4 feet long
- 6-by-8-foot (or slightly bigger) tarp, folded into an isosceles triangle
- Three heavy rocks slightly smaller than baseballs but larger than golf balls
WHAT YOU’LL DO TO MAKE A CAMP CHAIR
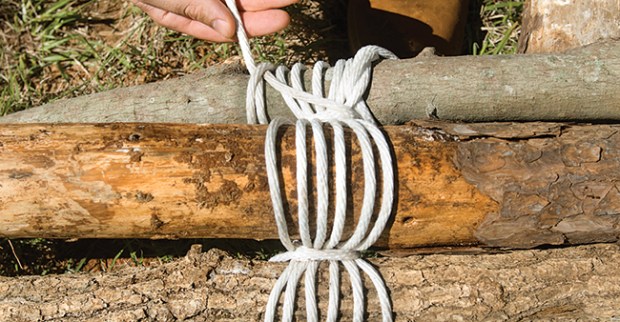
Step One: Determine which ends of each spar are the thickest, and designate those as the base of each spar. Lay the two shorter spars together on the ground, parallel to each other, with each base at the same end and even with each other.
Lay the long spar down in the opposite direction, with its base at the opposite end from the bases of the shorter spars, with only about two feet of overlap at the tops. Keep them all parallel.
Use the 30-foot rope to perform a tripod lashing around all three spars.
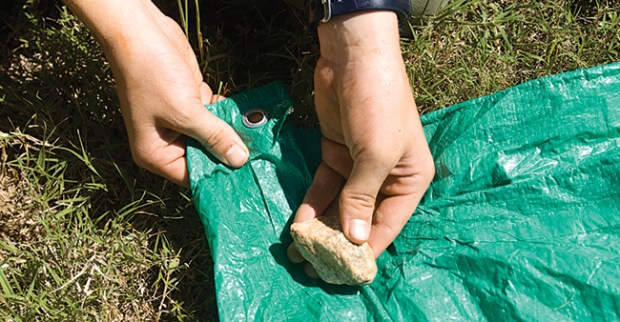
Step Two: Fold each rock into a corner of the triangle-shaped tarp and twist to create a pocket that will hold the rock. Then tie one of the three shorter ropes around the pocket holding the rock by wrapping a few times and tying off the end with two half hitches.
Be sure to leave 2 to 3 feet of rope available. Repeat for each corner.
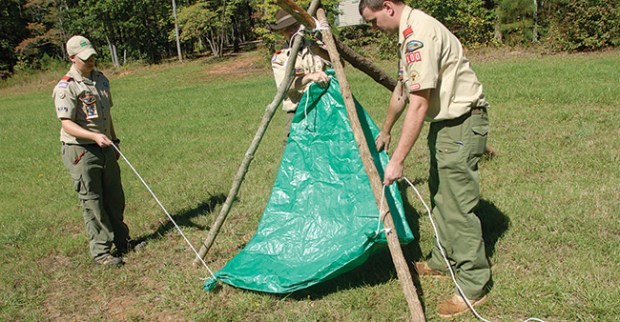
Step Three: Attach the tarp to the tripod by wrapping the remaining rope around each spar once or twice and finishing with a taut-line hitch.
The longest spar should act as the back leg of the camp chair, so attach the rope at higher point on that spar to create the back of the chair.
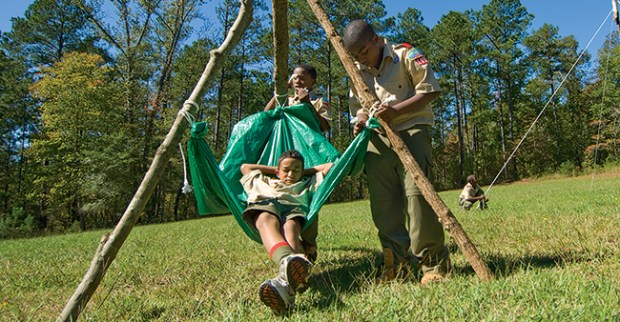
Step Four: Relax comfortably in your camping chair.
cool video i want to try that! it looks comfy
Our Cub scouts built three of these in about two hours. We gathered the poles a few days in advance and stripped the bark off. With a Boy’s Life Magazine close by, we followed the easy directions and were proud of our accomplishments when all three worked well. We even discussed how to change the design to make a hammock to sleep in. Thanks Boy’s Life, this was one of our best meetings.
smart idea with the hammok
I tried this and by using the end of a long rope to tie the tarp to the spar and tying the ropes to the spars at the same level the chair was better than a hammock and can be easily madde on a camping trip.
this looks comftorbal but complicated to build is there a simpler way of doing so
O.K. ya’ll I tried it(because it stopped raining) it works great!
It’s not complicated at all. It takes less than 20 minutes to make, not counting finding the spars and rocks.
Wow, that’s a most instructive video on how to perform a tripod lashing! A second video on how to prepare the tarp and to tie it to the spars is not shown. However, it is clear enough for me to do it with the assistance of the written instructions. In the flagpole video I learned to tie the taut-line hitch to the main line. In this video I learned that the hitch can also be used to tie a rope to a spar. The grip is good enough to hold the tarp without sliding down. I am just wondering whether Hurt Bottom had tied the taut-line hitch correctly to the spars. By the way, thank you again for the instructive video.
I tried making this at the last two campouts.
It didn’t work.
The tripod is fine, but when I attach the tarp, it slids to the bottom.
It still hurts.
Its cool.
Now this is preety cool im going to bulid this next trip.
me too you should probably write the directions down though so you know how:)
It’s raining outside, but when it stops, i’m trying this!!!