Make a Clock out of Flatware

What You’ll Need:
- 6 plastic spoons and 6 plastic forks, new or used
- Clock mechanism (from a hobby store)
- A circle cut from 1⁄4″ or 1⁄2″ wood of any type, about 7″ to 9″ in diameter. This will become the clock face. (You can also get a precut wooden circle at a hobby store). Some wooden circles come with holes already drilled in the center. The threaded clock shaft should be 1⁄8″ longer than the thickness of the wooden circle, so you can thread on the nut that holds the clock mechanism tightly in place.
- Keyhole saw (if you want to cut your own circle)
- Fast-drying glue that will stick the forks and spoons securely on the back of the wooden circle
- Drill
- Drill bit that is the proper size for the threaded clock shaft to go through the center hole in the wooden circle
- Sandpaper
- Paint
- Thumbtacks
Safety first: Ask an adult to help with tools you haven’t used before.
What You’ll Do:
1. Thoroughly wash the forks and spoons if you are recycling used ones.

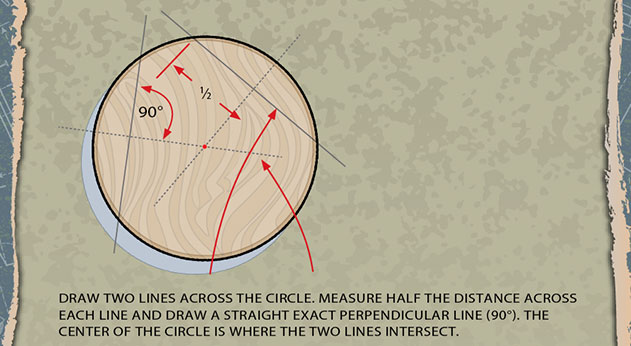
2. After your circle is cut out or purchased, sand the wood smooth. Turn the circle over so you are working on the back side. Locate the exact center. Draw two lines across the circle. Measure half the distance across each line and draw a straight exact perpandicular line (90 degrees). The center of the circle is where the two lines intersect. (See diagram for tips.)
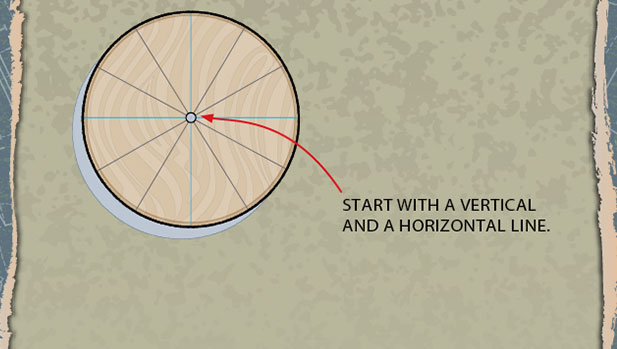
3. Draw a vertical line and a horizontal line that intersect at the center of the circle. Draw all the lines around the circle until you have 12 equal parts. Drill the proper-size hole in the center. Start with a vertical and a horizontal line.
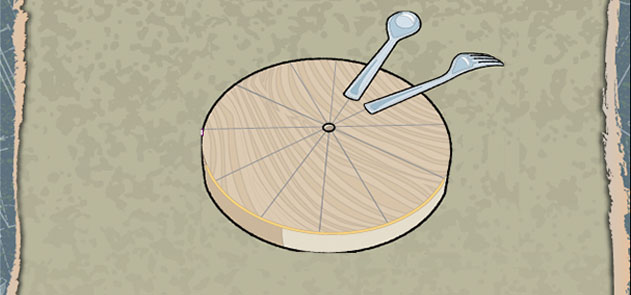
4. Glue the spoons and forks on the back of the circle. Leave enough room for the clock mechanism to be attached to the back. Paint the spoons, forks and wooden circle any color you wish.

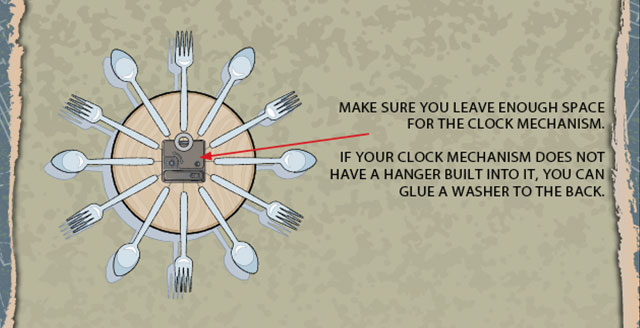
5. Follow the packaged directions and place the clock mechanism shaft through the center hole of the circle. Screw the mechanism securely in place. Attach the clock hands. Some clock mechanisms come with a hanger already attached. If yours does not, you can glue a washer to the back. Make sure you leave enough space for the clock mechanism. If your clock mechanism does not have a hanger built into it, you can glue a washer to the back.
6. Push the thumbtacks flush into the clock face. If it is too difficult, drill small holes that will allow the thumbtacks to fit into place. Each thumbtack represents a number on the clock. Put in the batteries, hang the clock on the wall and your project is complete.
I think this is really cool
Good idea for a kitchen clock.