How to Build a Balance Board

This easy-to-build training gear will prepare you for rocky trails.
WHAT YOU’LL NEED
- 3⁄4″ x 2′ x 2′ birch plywood
- 2″ x 4″ x 12″ board
- Tape measure
- Pencil
- 5-gallon plastic bucket
- Fine-toothed saw
- Keyhole saw or coping saw
- Drill, drill bits and countersink bit
- Wood glue
- 18 1 1⁄4″ wood screws
- Wood file
- Sandpaper
- Paint
- Paintbrush
WHAT YOU’LL DO

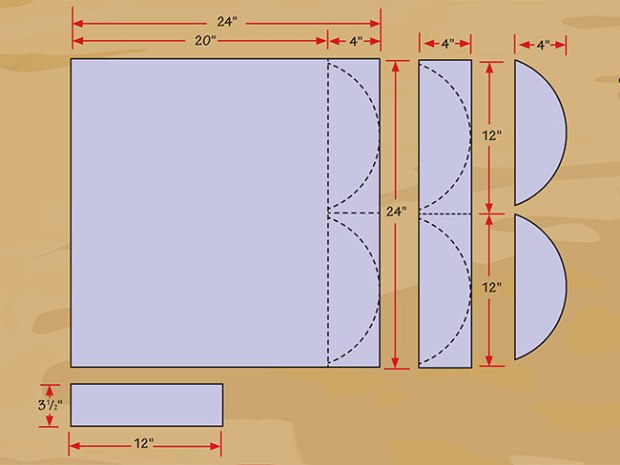
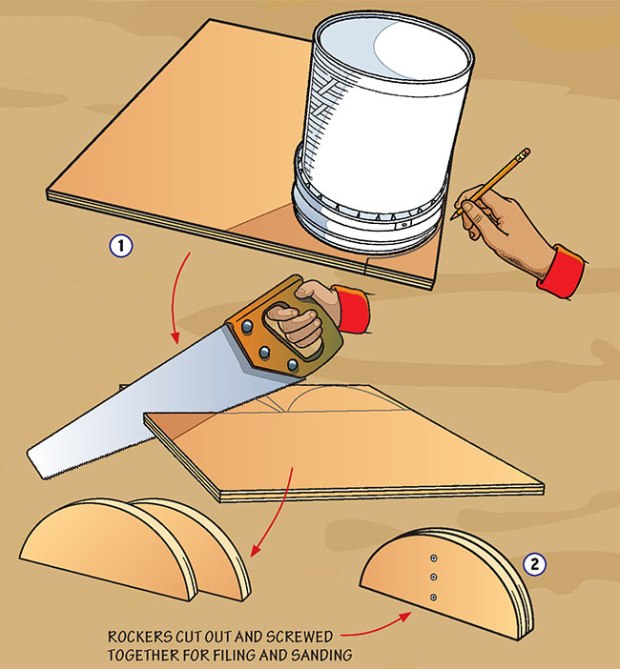
1. Cut out all the balance board pieces as shown. Use the bucket to trace the two curved rockers. Sand all the pieces.

2. Screw the two curved rockers together. File and sand them until they are smooth and exactly the same size and shape.
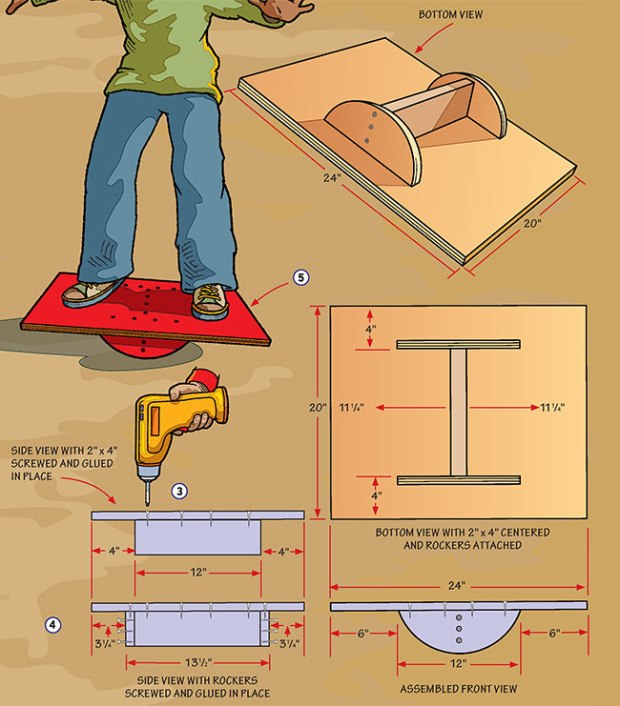
3. Screw and glue the 2″ x 4″ x 12″ board in place. Always drill pilot holes and countersink all screws.

4. After unscrewing them, glue and screw the two curved rockers in place. Make sure they are positioned exactly across from each other.
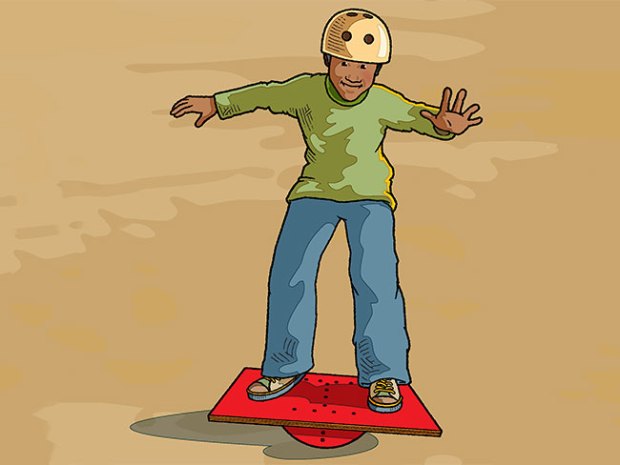
5. Paint the balance board or leave the wood bare. Your balance board is complete.
PHOTOS OF COMPLETED PROJECT
Check out these photos of the completed project sent to us by Boys’ Life readers. If you have a photos of a BL Workshop project, please use the form below to send them to us.


Leave a Comment