How to make a wooden periscope

You don’t need to be a submariner to appreciate a good periscope. What other device allows you to see over tall fences or around buildings?
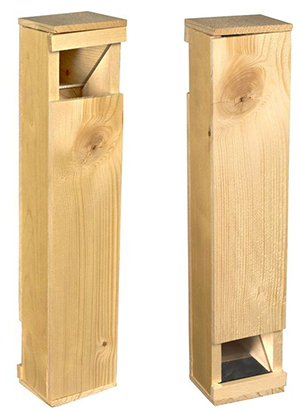 Making a periscope from wood and a few pieces of mirror is easier than you might think. Here are plans and instructions for a periscope more than two feet long — just what you want for heavy-duty secret agent work.
Click here for a PDF version of these instructions.
WHAT YOU’LL NEED:
- Two glass mirrors, 1⁄8-inch thick by 2 3⁄8-inches wide by 3 inches long
- Two pieces of pine or plywood 3⁄8-inch thick by 2 1⁄8-inches wide by 25 3⁄4-inches long (side members)
- Two pieces of pine or plywood 3⁄8-inch thick by 3 3⁄8-inches wide by 23 inches long (front and back parts)
- Two mirror blocks 2 1⁄8-inches thick by 2 9⁄16-inches wide by 2 3⁄4-inches long, cut into triangular blocks according to diagram
- Silicone caulking, carpenter’s glue, 1-inch finishing nails
- Adult permission and/or help
WHAT YOU’LL DO
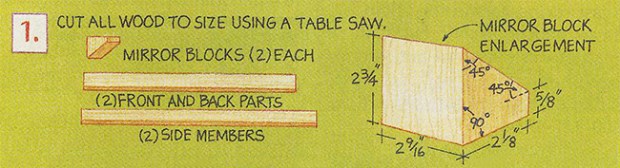
Step 1: Cut wood to size using a table saw.
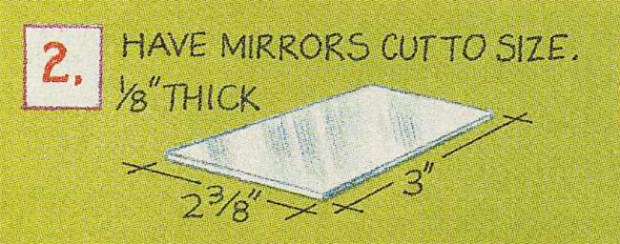
Step 2: You can have the mirrors cut for you at any glass shop, or you can prepare the mirrors yourself using a glass cutter. If you go to a glass shop, bring the mirror blocks with you so they know what size you need. If you do it yourself, make sure there is an adult on hand to help you. The mirrors shouldn’t cost more than a few dollars.
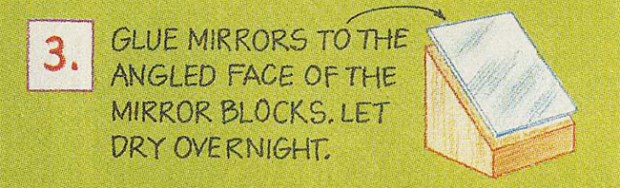
Step 3: Glue one mirror to each angled face of the mirror blocks, using silicone caulking. Set these aside to dry overnight.
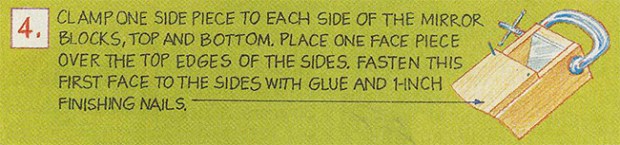
Step 4: Clamp one side piece to each side of the mirror blocks, and then place one face piece over the top edges of the sides. The plans show how this face piece is shorter than the sides, and must extend to the top of the periscope. That leaves the mirror open for you to look through. When everything is lined up, fasten this first face to the sides with carpenter’s glue and 1-inch finishing nails. Don’t glue the mirror blocks yet. They must be free to move around for adjustment later.
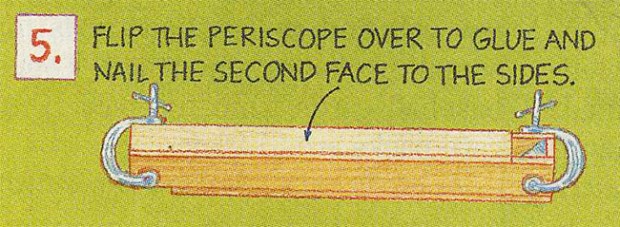
Step 5: Now flip the periscope over so you can glue and nail the second face to the other edges of the sides. This will form a long, rectangular box—your periscope.
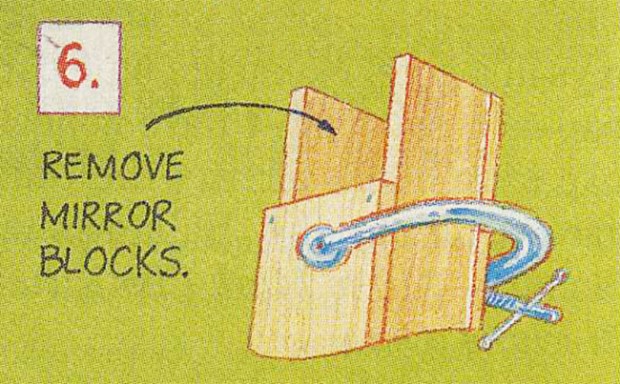
Step 6: Before setting the project aside to dry, slide the mirror blocks out, just to be sure they don’t get glued in.
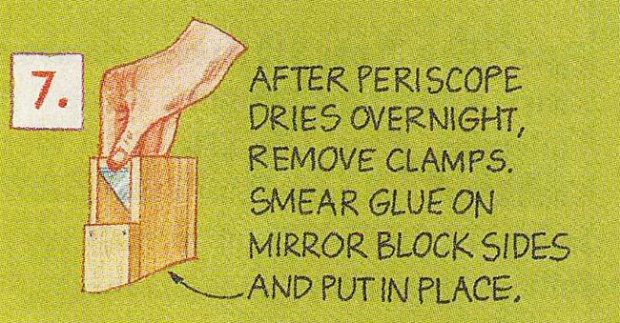
Step 7: After letting your periscope’s body dry overnight, remove the clamps, smear a little glue on the mirror blocks’ sides and slip them back in position. If friction alone doesn’t keep them in place, hold them still with a few small clamps across the sides of the periscope.
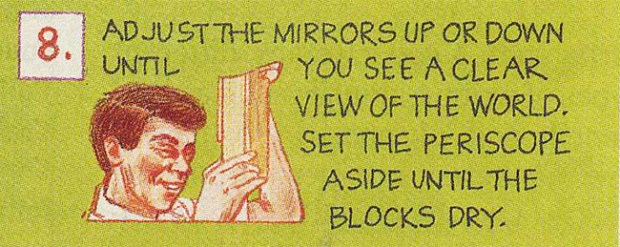
Step 8: It’s now time for adjustment. Pick up the periscope and look through one end; it doesn’t matter which. How do things look? If your line of sight seems tilted, adjust the direction of each mirror up or down until you’re happy. You won’t have to move the blocks much. When you can see a clear, rectangular view of the world, that’s great! Just set the periscope aside until the glue blocks dry.
Step 9: Finish by sanding the periscope and applying three coats of urethane.
tora tora tora cool
COOL
Hello! great idea of color of this siyte!
If you stop making cool things like that,IM GONNA DIE!!!!!I NEED THIS WEBSITE!!!!
…awesome…..
this website rules!!!!!! dont stop working on it.
It really works sora out.
this going to be cool.
Awesome
This is neat but probably heavy to carry around.
Ibit its not