Make a 3D camera
Look at a nearby object. First, close your right eye. Now, open it and close your left eye. You see a different view of the object with each eye. But with both eyes open, you see one blended image that’s three-dimensional (3D).
A stereograph is a special kind of picture that works the same way. By giving a different view to each eye, it creates the illusion of depth, as if you could walk into the picture. Our 3D vision works effectively to the range of about 100 feet. Beyond that, we make guesses about depth from what we know about the world.
For example, if you see a man who looks bigger than a truck, you know the reason. He’s standing closer.
These images are called stereographs. They were a popular form of entertainment around 1860 until moving pictures started to gain popularity. They are still used in map making, science (micro photography, modeling) and 3D puzzles.
You can capture your own 3D images. Here’s how.
WHAT YOU’LL NEED
- Two single-use cameras
- One 1 1/4-inch slotted angle bar, 9 inches long
- Two 3/8-inch-wide strips of cork or rubber matting, 9 inches long
- Elmer’s Stix-All glue
- One wood spacer, 1 inch by 2 inches by 2 3/4 inches
- One wood spacer, 1 inch by 2 inches by 1 inch
- Four 14-inch cable ties
- Fingernail clippers
- Metal file
- 3/4-inch wood screw and washer
- One wire coat hanger
- Access to a color copier
- Wire cutters
- Pliers
BUILD THE BASIC 3D RIG
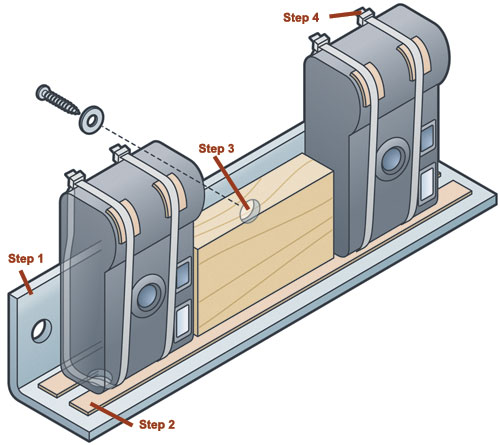
Step 1: File the corners and exposed edges of the slotted angle bar to make it snag-free.
Step 2: Glue the cork or rubber matting to the angle bar base.
 Step 3: Mount the longer wood spacer at the center of the angle bar with a screw and washer.
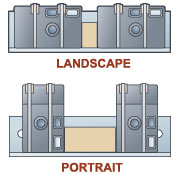
Step 4: Clamp the cameras to the base on either side of the spacer with the four 14-inch cable ties. Trim ties to the nub with fingernail clippers. The wood spacer will keep the camera lenses about 5 inches apart. For landscapes use the small spacer.
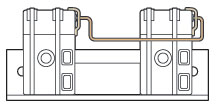 Step 5: To make a trigger rig, cut a coat hanger with wire cutters and bend the hanger so that the ends touch the cameras’ shutter buttons at the same time. Keep the hanger in place with strips of mat or cardboard.
NOW, MAKE A STEREOGRAPH
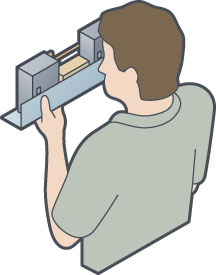 Step 1: Find a comfortable grip on the rig, aim at your subject and press the buttons on both cameras at the same time.
Step 2: Keep at least 10 feet from your subject for natural-looking 3D. Frame your picture in one of the viewfinders. Remember to advance the film in both cameras.
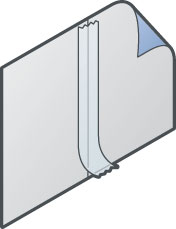 Step 3: Mark the cameras left and right, so you’ll know which is which when the pictures come back from the developer. Ask for 4-inch-by-6-inch prints. Put the paired left and right pictures edge to edge and tape the back seam.
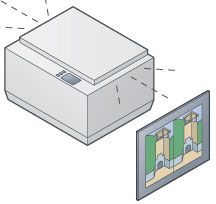 Step 4: Reduce the paired pictures on a color copier. Portraits require an 85-percent reduction. Landscape photographs require a 55-percent reduction. Glue to poster board and cut out to make your own stereographic view cards.
HOW TO VIEW
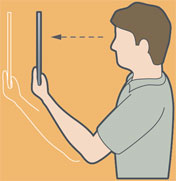 If you already enjoy 3D illusion puzzles, you know how to look at stereographs.
If not, here’s how: Hold the middle of the stereograph to your nose. Try to look only at the image in front of each eye and draw away slowly until the images are in focus. You will see three images. The middle one is in 3D and will seem to float in space somewhere behind the card.
SEE MORE
Read all about stereographs and look at great pictures in “The World of Stereographs” (Land Yacht Press, 1997) by William C. Darrah.
I would like to watch movies
If I had to cameras I would so try this!:)
ditto
I looked at the make your own camra but this is more awsome 😀
so much work!!!
I Agree
I’m so doing that
I am so trying that out
that i need
cool!
really awsome and cool
AWESOME! 🙂