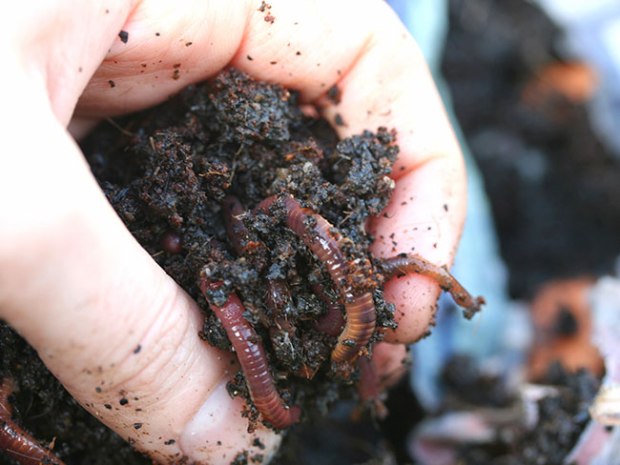
How to build a worm bed to start a small worm farm
Have you ever wished you could dig money out of the ground? In a way you can. Raising worms in a small worm farm can make you extra money during the summer. Bait stores and fishermen are always in need of worms. Gardeners and farmers use them to help their plants, because worms burrow into the soil allowing air and moisture into it. This helps the roots grow deeper and stronger.

Getting started is easy. Everything you need can be found in your local home-improvement store. You can estimate spending about $50 on the supplies needed to build your worm bed.
Click here for a PDF version of these instructions.
What You’ll Need
- 2 25-lb. bags of cement mix
- 6 7-inch by 1⁄4-inch by 6-foot boards
- 6 7-inch by 1⁄4-inch by 3-foot boards
- 6 2-inch by 1⁄4-inch by 2-foot boards
- a 3-by-6-foot screen mesh
- adult permission and/or help
The boards can be bought new or you can use old boards you have lying around. The boards may be different sizes as long as they are equal to the size of the bed.
What You’ll Do
STEP 1: Pick a spot that is shady most of the day.
STEP 2: Measure an area 6 feet long by 3 feet wide.
STEP 3: Dig a hole the size of that area to 36 inches deep. (Ask your parents permission first.) Keep some of the dirt for use later.
STEP 4: With your boards, make a box frame to fit inside the bed you’ve dug. The box will be set into the ground about a foot below the surface.
STEP 5: Place the frame inside the bed. There should be a 1/4-inch gap around the outside of the frame.
STEP 6: Mix the cement according to the directions on the bag.
STEP 7: Pour the concrete into the 1/4-inch gap around the box. Don’t overfill into the bed.
STEP 8: Let the concrete harden. Remove the frame one wall at a time.
STEP 9: Fill the bed with a mixture of peat moss, shredded newspaper and part of the dirt you removed.
STEP 10: Make the top from two of the 6-footlong boards and two of the 3-foot boards. Nail the screen mesh to the boards to make a rectangular door-like frame.
STEP 11: Place the top on the worm bed. This will keep animals out of the bed.
Ordering Your Worms
Now order your worms. The best way is from a worm supplier. You can find a list of these in any outdoor magazine, or you can go to the Internet. One example: www.wormman.com. Suppliers will have several different types of worms. Ken Chiarella of Monroe Township, N.J., the Worm Man behind the Wormman.com Web site, recommends red worms for the beginning worm farmer because they’re cheap and easy to raise. Mr. Chiarella warns that you should let your bed sit for several days before you add the worms. Otherwise decomposition will make the soil too hot and the worms will crawl away.
Easy to Please
Taking care of your worms is easy. They will eat anything from leaves to small stones. Table scraps such as banana peels, lettuce and even paper towels can also be added. Feed and water your worms every other day. Use a garden hose to lightly spray the bed until it becomes moist. Let your worms settle into their new home for two months before you start selling them. It is best to use a pitchfork when removing the worms from the bed. Worms are night creatures, so the best time to dig is early morning and late evening. Mr. Chiarella said that 1,000 red worms could turn into tens of thousands more in a year, depending on how much space they have in which to breed.
ok!
try feeding your worms a mixture of protein powder that you get at any health food store and whole grain wheat bread. it makes your worms BIG AND STRONG!!!
There are many boxes, this one really works. It has provided enough worms for the season and has been profitable. Thanks for the cool idea. The best thing is the profit makes it’s self. Word of mouth and just being at your local lakes at the right time of the day. Most people run out of worms around noon or 2pm. All I do is have plenty of worms to go around.
We have a much smaller version, I caulked a screen onto the bottom of a larger planter with pre-drilled holes. Filled it with a mixture of soil and peat moss to a little more than half full, then added both nite crawlers and red worms that I found while gardening. I place the planter inside a window well on the northeast side of the house which is very shady. I occasionally water & feed them small amounts of egg shells, coffee grounds, shredded paper, dried plants/leaves, whatever natural scraps I have. No cover on it. They multiply quickly and we always have our fishing bait. We release them (if there are any left) late fall as they would freeze in our Wisconsin winters.
Built 2 last year, Did wonderful, now I have 8 more making 10. Worms are 3.50 a box at the store, I get 2.00 a box and can’t keep up. Thanks a million……
I have found that as long as the worms are happy they stay, even without a bottom. Even so, I added a wire and screen bottom to mine.
Once again, Thank you……… :-))
this sounds like a great idea but i think waater will collect at the bottom!!!!
how many worms do i need to start?
Great i’ll go fishing towmorrow
i think that you r right and that the worms will bring lots of money!!!
This works great, thanks!!!