How to Build a Snow Cave
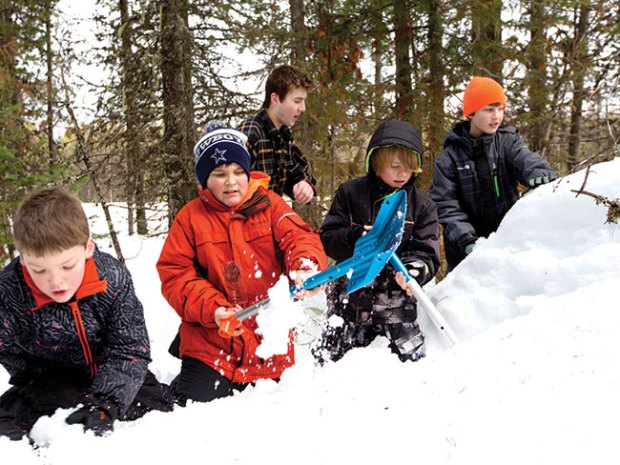
A T-shaped snow cave is a quick and efficient way to protect yourself from even the worst winter storm. Locate a large snow drift or steep, stable snow slope, and start digging with the instructions below.
1. DIG THE ENTRANCE
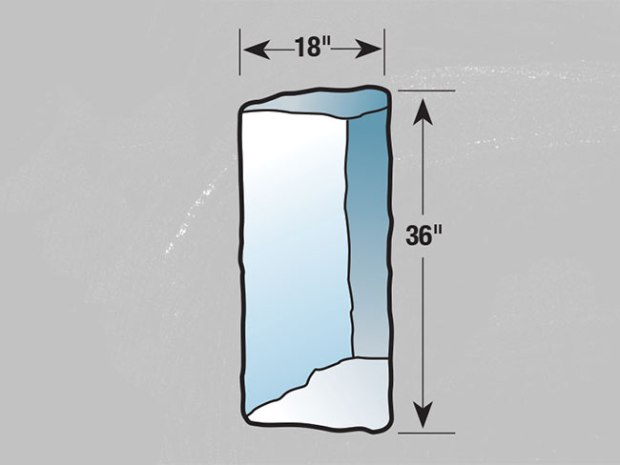
Dig an entrance about 18 inches wide and as high as your chest.
2. WIDEN INTO A T SHAPE
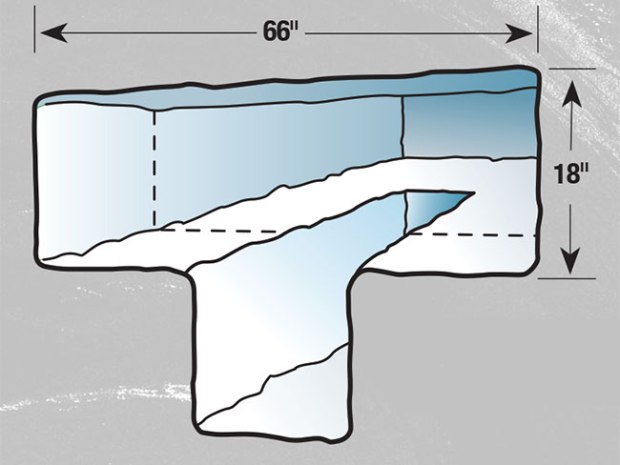
To make it easier to dig, widen the top of the entrance to form a T shape.
3. EXCAVATE THE INTERIOR
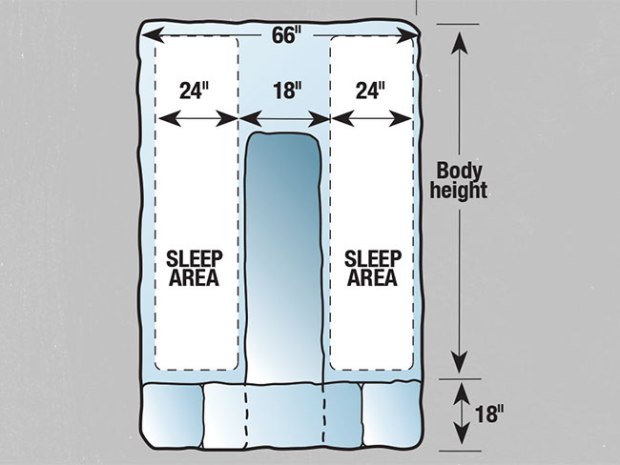
Dig several feet farther into the drift and excavate the interior of the cave. The floor of the cave will be at about waist level, so much of your digging will be upward and to the sides.
4. SEAL THE TOP OF THE ENTRANCE
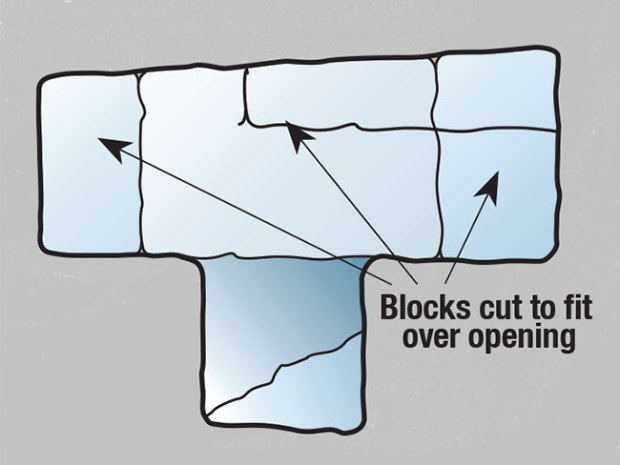
When the interior space is fully formed, use blocks of snow, bags of snow or snowballs packed together to seal the top of the T.
5. POKE VENTILATION HOLES
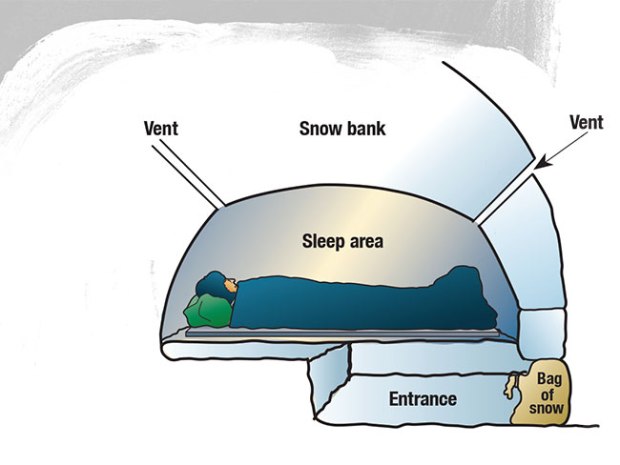
Use a ski pole or shovel handle to poke several ventilation holes in the ceiling at a 45-degree angle to the floor. Use a bag of snow to seal the tunnel entrance.
1.Use a heat source to glaze the curved ceiling (ensuring the upper vents are maintained). Otherwise the elasticity of the snow will aĺow the roof to droop into the lining space.
2. Allow for heavier than air gases to leave via a lower vent.
Sounds like FUN or you could move to Florida !!!
…or if you don’t have a domed tent, maybe a look for large hotel with a hatted restaurant and a well stocked cellar. Double voila!
Excellent. Twice, Ì have built and slept in my snow caves. For work.
Thanks a lot! I am doing a presentation on shelter building and this was good info.
Every time I see these things posted in scouting. It seems to miss two things which I have ordered a relatively important over the years while back country camping.
First, it’s good to bring your shovel inside with you when you sleep at night. Though there is no expectation that your cable will collapse if your shovels on the outside and something begins to fail that’s the wrong place for it.
Second, we talked about all the prior planning and site selection, but we don’t talk about teardown. Especially if you’re building on the side of a slope or an area where you may have hikers or skiers or snowboarders, it is important to break down the cave when you’re done.
That was good steps for a snow cave
When you are done enjoying your snow cave collapse and destroy the cave so other kids don’t come along and make a grave mistake.
This didn’t talk about arching the roof. It is MUCH more likely to cave in if the roof is not arched.
I wish the graphics included more human figures. I can’t really make out exactly what’s being described.
In a location with very cold, light powdery snow, digging without collapse can be a problem. Try a large dome tent, carefully covered with snow…
and there you go. Voila!