How to Build a PVC Sprinkler for Summertime Fun
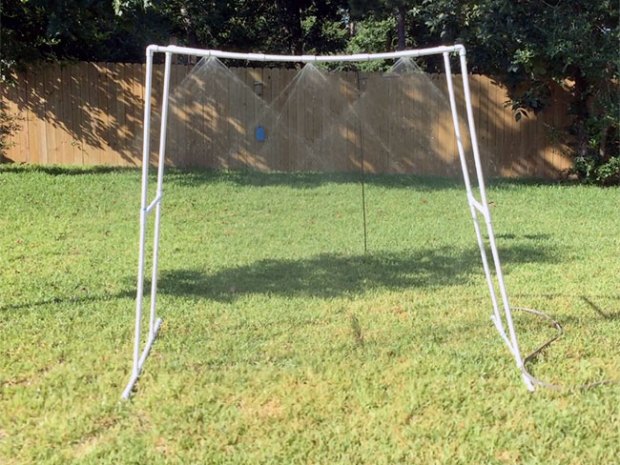
Want to beat the summer heat and have a blast right in your own backyard? Make a homemade backyard sprinkler system for kids that will everyone cool and entertained all summer long.
This fun DIY project is made from affordable and easy-to-find PVC pipes, making it a budget-friendly solution for some watery fun. Whether you’re having a family gathering, hosting a party, or simply seeking to cool off outdoors, this backyard water park is guaranteed to be a hit with everyone!
Have you built it? Make sure to send us a photo.
WHAT YOU’LL NEED TO MAKE A HOMEMADE BACKYARD SPRINKLER
- Five 3⁄4″ x 10′ PVC pipes
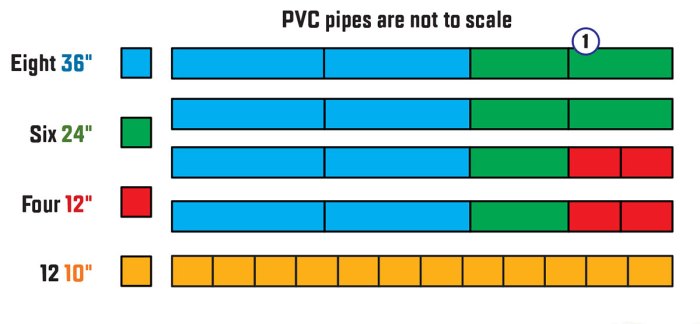
Following the cutting diagram below, cut the following lengths from the five 3⁄4″ x 10′ PVC pipes:
- Eight 36″ pieces
- Six 24″ pieces
- Four 12″ pieces
- 12 10″ pieces
The following are 3⁄4″ fittings:
- Four 90-degree elbows
- 12 T-connections
- Three end caps
- Six 3⁄4″ to 1⁄2″ reducer Ts
- One hose connector
The following are 1⁄2″ fittings:
- Six 1⁄4 pattern shrub sprinkler heads
- Six 6″ cut-off risers
- Pencil
- Measuring tape
- Fine-tooth saw or pipe cutter
- PVC glue
- Sandpaper
- Eye protection
WHAT YOU’LL DO TO BUILD YOUR BACKYARD SPRINKLER
1. Follow the cutting diagram below and cut all the pieces to length. Sand the ends of each piece.
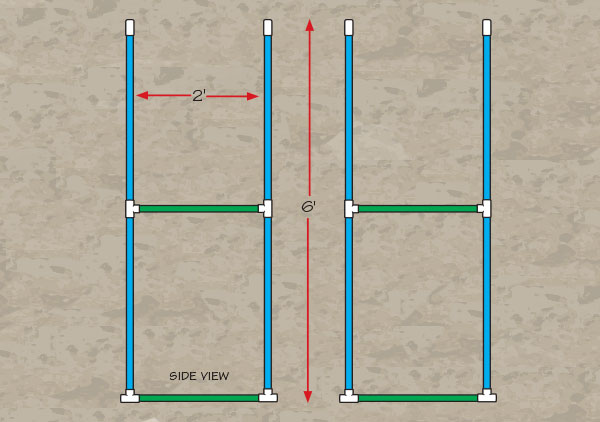
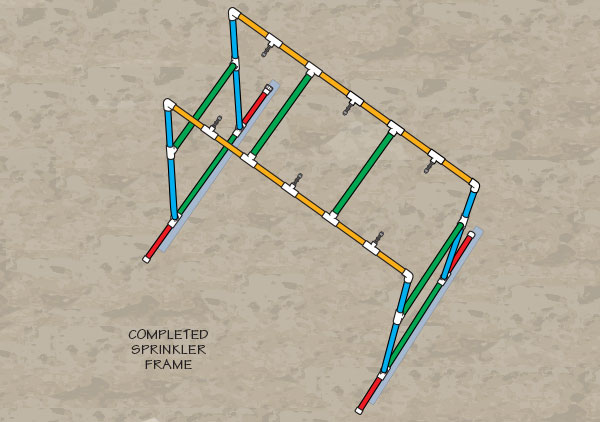
2. Glue together the four 6′ vertical uprights. Connect the uprights with 2′ braces. These are the sides of the sprinkler’s frame.
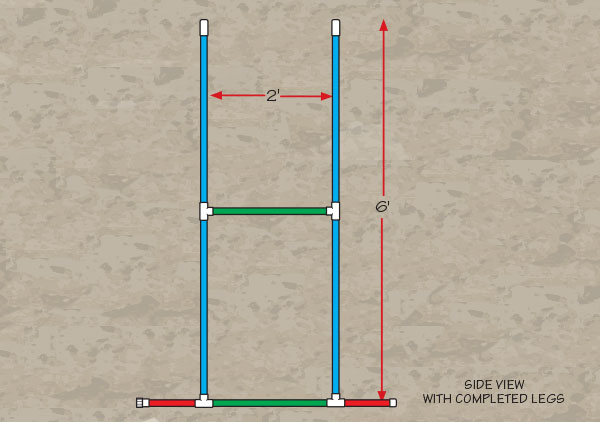
3. Complete the horizontal ground support legs by gluing on the 1′ end pieces. Glue on the end caps and hose connector.
4. Glue together the top two 5′ cross pieces. Connect them with two 2′ braces.
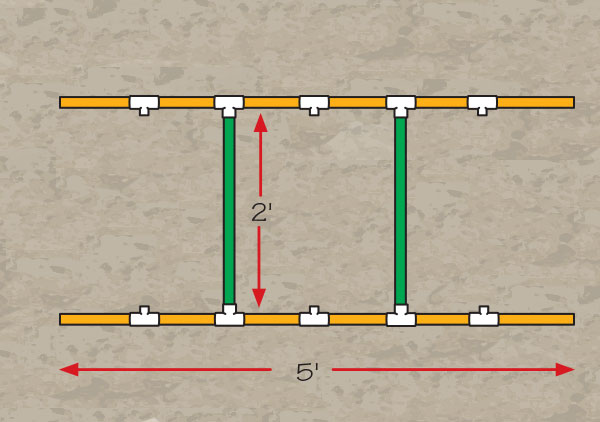
5. Glue the assembled 5′ top section to the 6′ vertical leg assembles. Screw in the six cut-off risers and shrub sprinkler heads.
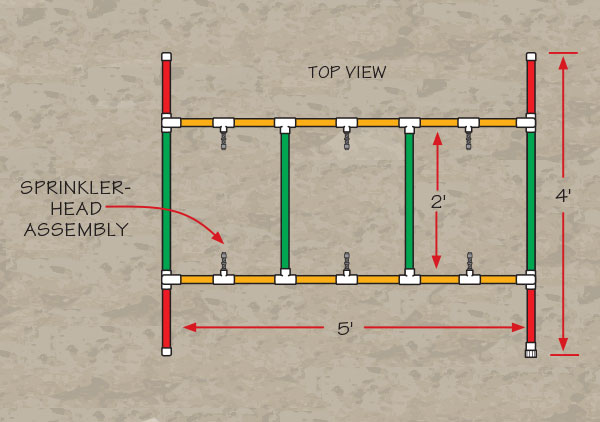
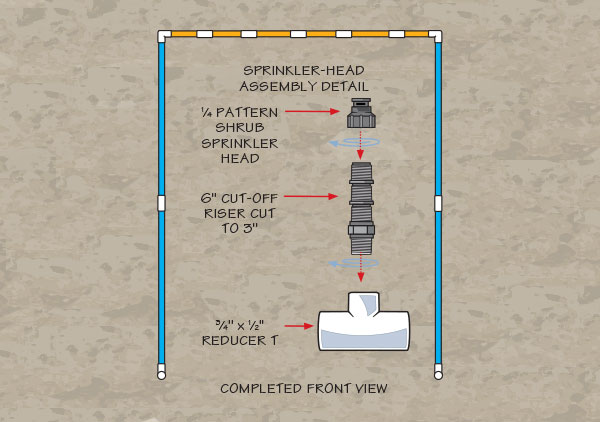
6. Attach a water hose, and your homemade backyard sprinkler for kids is complete. Remember to conserve water. Always follow local water restrictions and use this sprinkler in an area where you’ll be watering the grass while you play.
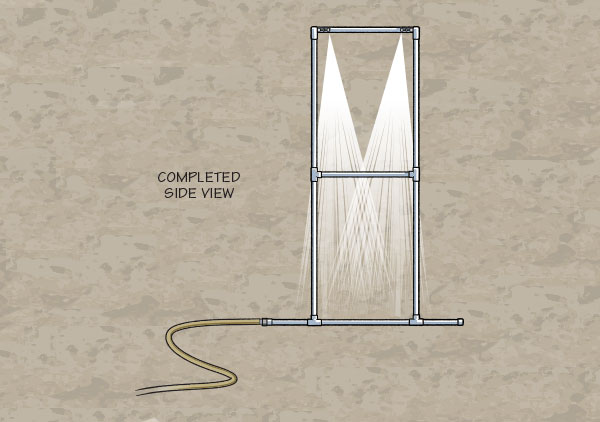
PHOTOS OF COMPLETED PROJECT
Check out these photos of the completed backyard sprinkler project sent to us by Scout Life readers. If you have a photos of an SL Workshop project, please use the form below to send them to us.


i want one but i live in an apartment
I want to build one but I don’t have the time. it is super cool though
Super Cool! Im gonna build one!