How to Make a Clothespin Lamp
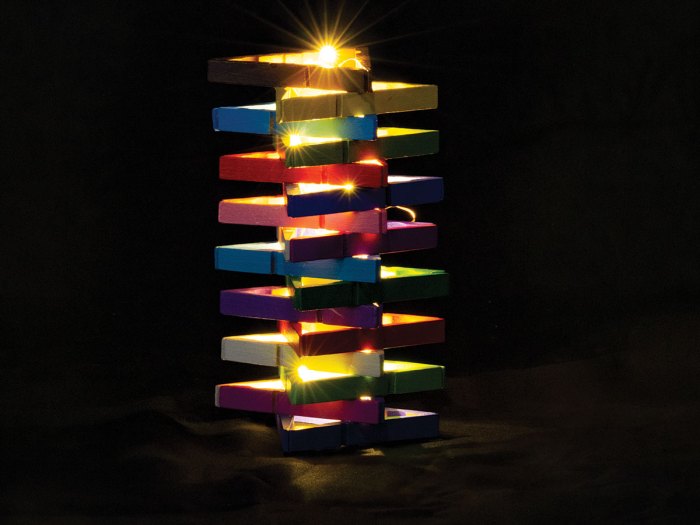
Add a fun touch to your room décor with this crafty clothespin lamp!
WHAT YOU’LL NEED TO MAKE A CLOTHESPIN LAMP
- 24 wooden clothespins (all one size, any color)
- Battery-powered LED lights (available at craft stores)
- Craft or fabric glue
- Parchment paper
- Tape (optional)
- Markers, paint, construction paper, fabric (optional)
WHAT YOU’LL DO
STEP 1. COVER YOUR WORK AREA WITH PARCHMENT PAPER. Crumple the parchment paper first to help keep it flat. You can also tape down the corners.
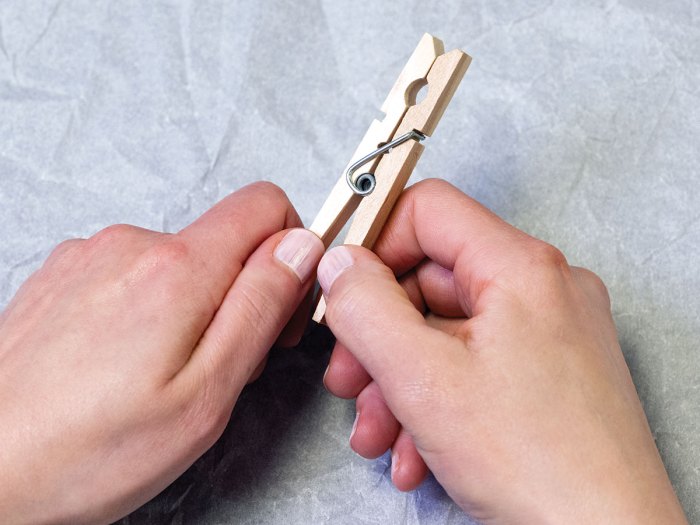
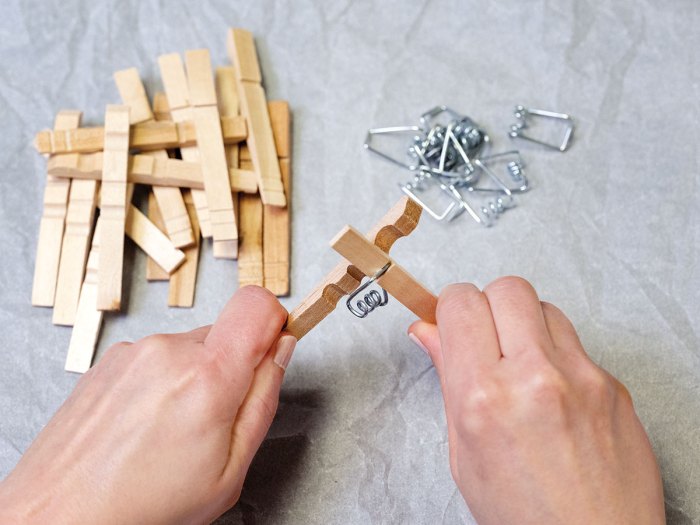
STEP 2. TAKE APART THE CLOTHESPINS by slowly and carefully twisting the wooden legs in opposite directions, removing the spring in the middle. Ask an adult for help if needed. Place the wooden and spring pieces into separate piles. You should have a total of 48 wooden legs.
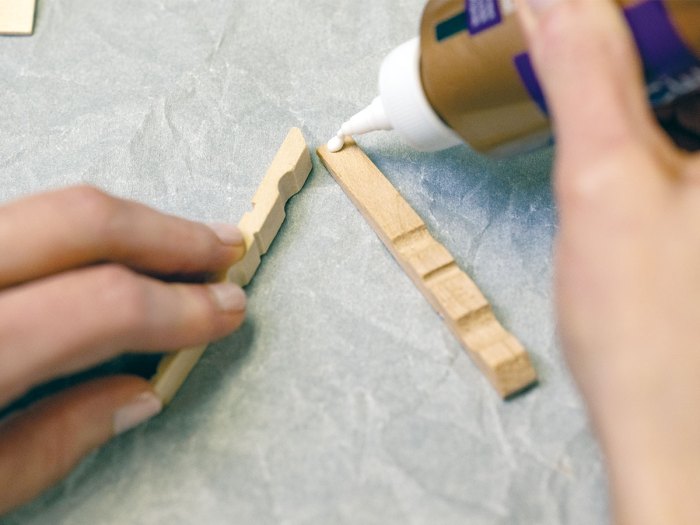
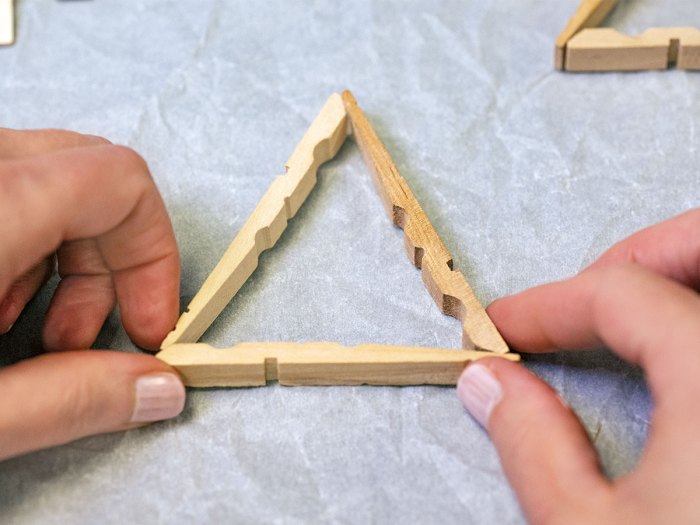
STEP 3. MAKE A TRIANGLE USING THREE WOODEN LEGS. With the grooves facing inward, glue the thinner end of one leg to the thicker end of another. Continue this step until you have 16 triangles. Let your triangles dry for about 15 minutes.
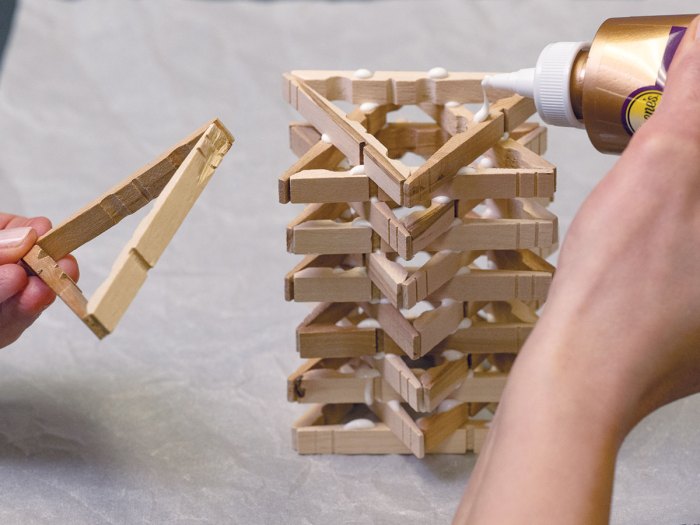
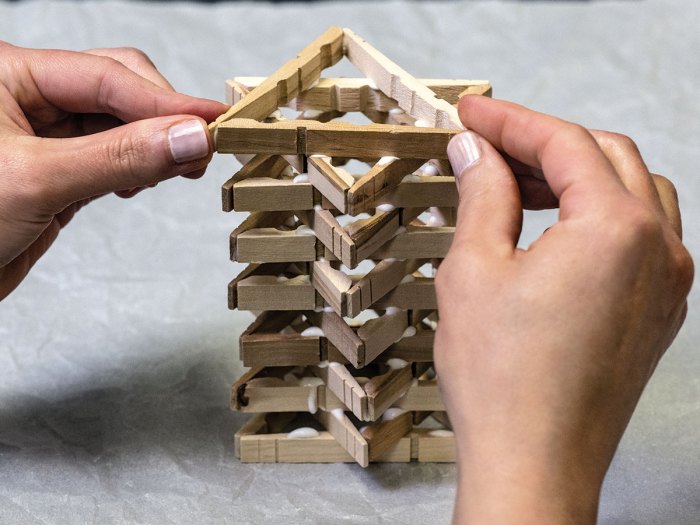
STEP 4. BUILD YOUR LAMP. Put one triangle in the center of your workspace — this will be your base. Take another triangle and flip it in the opposite direction of the base. Glue it on top. Note: Each layer of the lamp should be oriented opposite to the one below it. This will help create openings for the light to shine through. Continue this step until you have 16 levels. Let your lamp dry for about 15 minutes.
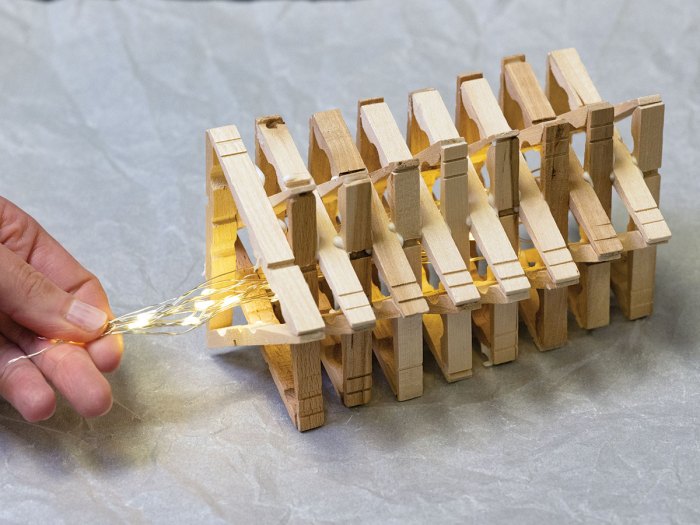
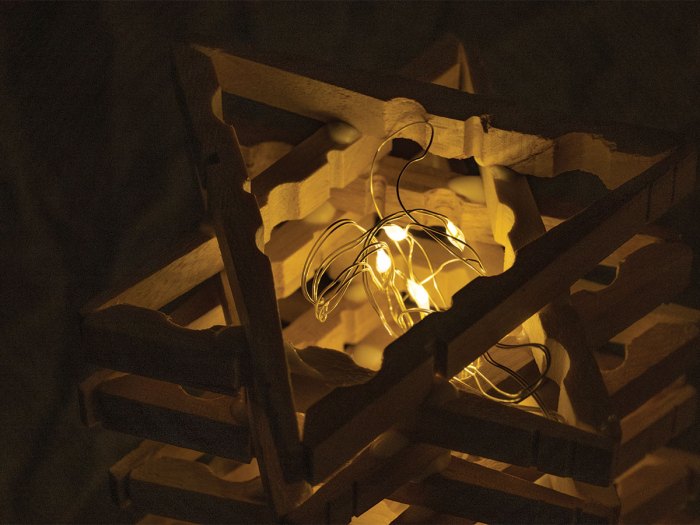
STEP 5. INSERT YOUR LED LIGHTS INSIDE THE LAMP. Your lamp is ready to use!
STEP 6. DECORATE YOUR LAMP! You can use markers, paint, construction paper, fabric and more. You can also glue the spring pieces from the clothespins to your lamp instead of throwing them away.
PHOTOS OF COMPLETED PROJECT
Check out these photos of the completed project sent to us by Scout Life readers. If you have a photos of a SL Workshop project, please use the form below to send them to us.

Leave a Comment